Magazine
 Poster

Trailer
 Poster
For easier navigation through my blog please use this post!
All of my posts are sub divided into 5 subheadings they are as follows:
– Preliminary Task
– Pre-Production
– Production
– Diary Entries
– Evaluation
 By clicking on this the subheadings listed above will appear – this button is situated on the right of my header title and picture.
When this button is clicked a menu like bellow will appear, where you can chose what post you wish to view. 
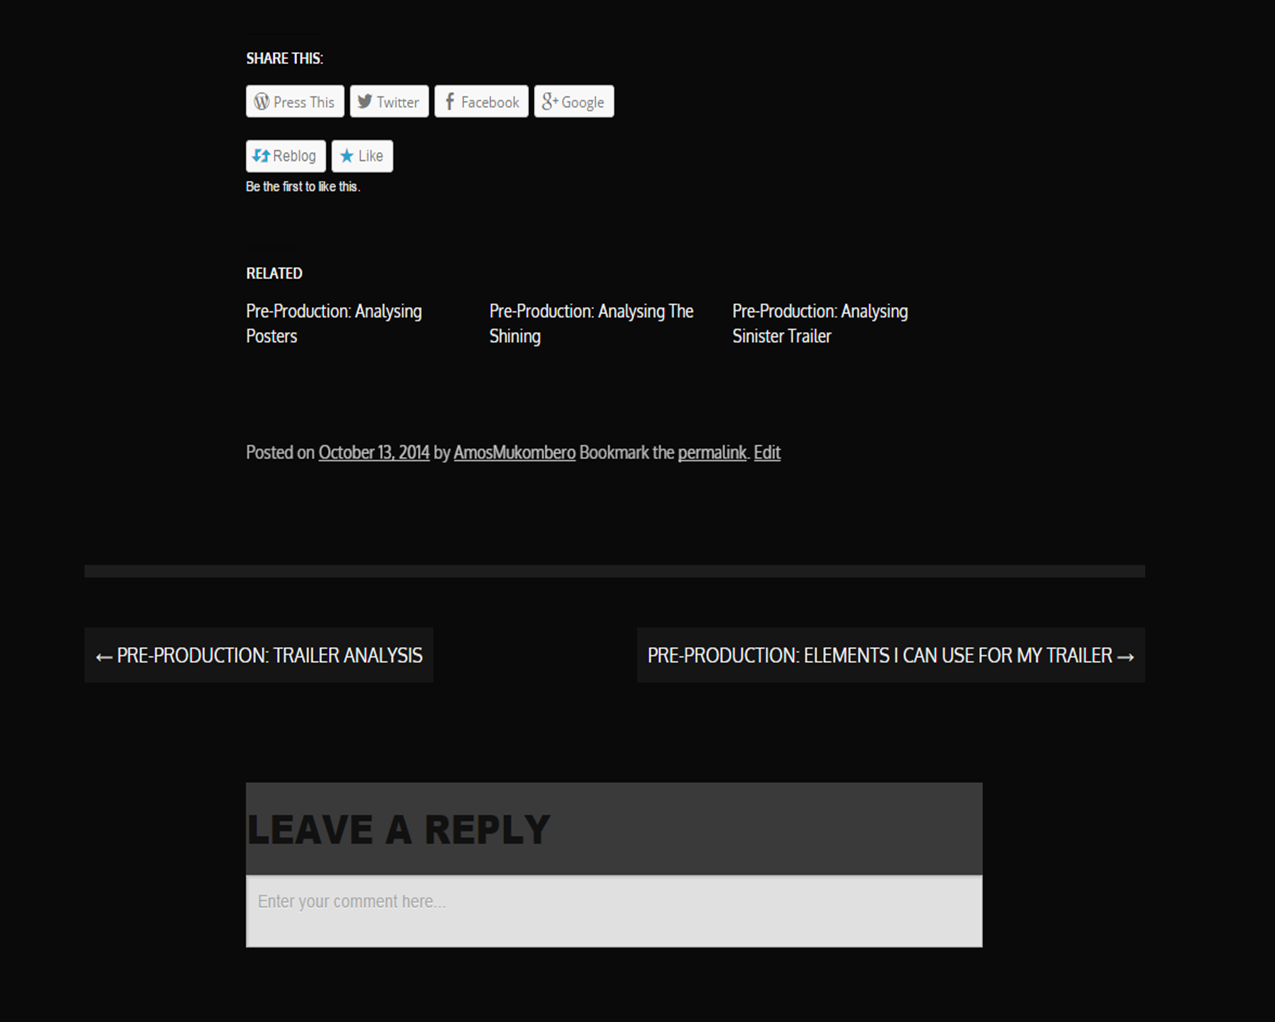
On the bottom of all of my posts you will find tabs which will allow you to click through all of my posts. They are in the same order as my menu. With this is also the option to chose related posts to the post you are currently on. There is a forward and previous option. At the bottom of my posts you can also share my posts on other social networking websites. You can also leave a comment. Comments are always useful. Below is an example what this will look like.
How did you use new media technologies in the construction and research, planning and evaluation stages?
For the research, planning, construction and evaluation stages of my project I have used a wide range of technologies. My decisions were based on the technology that best fit the task at hand. Programmes I have used are as follows: DSLR camera and tripod, Camera, Celtex, The internet – google, YouTube, DaFont, twitter, Facebook, IMDb, Adobe Photoshop, Adobe InDesign, Adobe Premiere pro, iPhone 5s – applications, digital camera , slide share, google docs, word, PowerPoint, excel etc.
In this essay I will be illustrating how I used these technologies in my project. I will also analyse them, stating whether they were effective or no. I will sub divide the essay into four sections; Research, Pre-production, Production and Evaluation.
WordPress is a content management system that allows users to blog freely. It was an essential for my coursework. Without it I wouldn’t have been able to present my coursework.
YouTube throughout my whole project was a website that proved very useful and effective! YouTube is an uploading platform where you can publish your own videos. This is website was then fundamental for my coursework as I had to upload our trailer on YouTube.
I could watch tutorials on how to do and use certain things that I didn’t know how to use, quickly and efficiently. I could also use this website on the go, if I had to wait around for any reason I was able to stream a video on how to do something like ‘how to create a horror poster on Photoshop’. I could watch example works from previous students work, I could also watch professional works – real trailers for inspiration for our own trailer, and for my ancillary texts. YouTube saved me money as it is a free website with many resources!
For the research stage of my coursework, I started with being assigned a preliminary task, where my group and I had to get familiar with the filming equipment that we had to use to film our final trailer product. We used the DSLR camera and tripod to create a six shot short movie with a title ‘Running from the Enemy’. This task proved very useful and only one of the three people in my group had ever used the camera properly in the past. So it helped build confidence with the functions of the camera like focusing (automatic and or manual), how to shoot the perfect shot i.e. getting in the correct positions – levelling, what I mean by this is how far away you should be when you are recording to still be heard clearly and to keep the quality at an optimum level. Distance would prove a very important factor. After this task my camera work was a lot better, i was still a novice but I understood the different buttons on the camera and what they do. This was important as we wanted to make our final trailer as best as it could be and that meant being able to stretch the functionality of the camera as far as possible to get the best results.
From shooting we had to edit the pieces together. For this we used Adobe Premier Pro, which is a application on an Apple Mac however it’s also accessible on a PC. This was another learning curve, as the whole group didn’t know how to use the programme. To overcome this we watch a few YouTube videos one being, ‘An introduction to premier pro CC’ by ‘David Clarke’ in this video illustrates how to set up a standard document, importing new videos to create sequences – this is prompted by the programme as an essential. It talks about the functions of the timeline, how to insert clips into it and edit them visually and auditory, it give shortcuts, it talks about sync locks for the video and for the audio – (editing the video and audio simultaneously), it shows you how you can change the layout of the functions so as the user you are comfortable. The video shows you how to edit the audio using the audio mixer etc. Premier pro was very effective for my whole project as it gave our work a professional touch, which was important to gain top marks.
For the pre-production stage of my coursework programmes that I used were as follows:
I used YouTube and IMDb together. I used IMDb to find horror trailers as I am not a major fan of this genre I needed a guidance/list of movie choices. IMDb was useful to read reviews, synopsis of films and then went on YouTube watch the trailers of the movies I chose. Doing this was efficient as there is a large database of horror movies to choice from; old and new.
I used Voice Memos on my iPhone as a presentation tool for my blog. With this app I recorded myself presenting a blog post I had created so the viewer could listen as well as read the post. It made the post more interactive.
Microsoft word is a graphical and word processing program that allows the user to type documents out. It is a very useful program to document work without handwriting. It take us less time. This was perfect for the essay stages of my coursework. The programme also has literature advances that aids grammar, spelling and punctuation. This is a very useful asset to my coursework, I could use this programme with every stage.
Microsoft PowerPoint is a slide show presentation programme that allows the user to present work interactively. The user can create audience print outs and speaker notes. This programme was very useful for my coursework as it allowed me to present my work in different formats.
Technologies I used for this stage of my coursework were as follows:
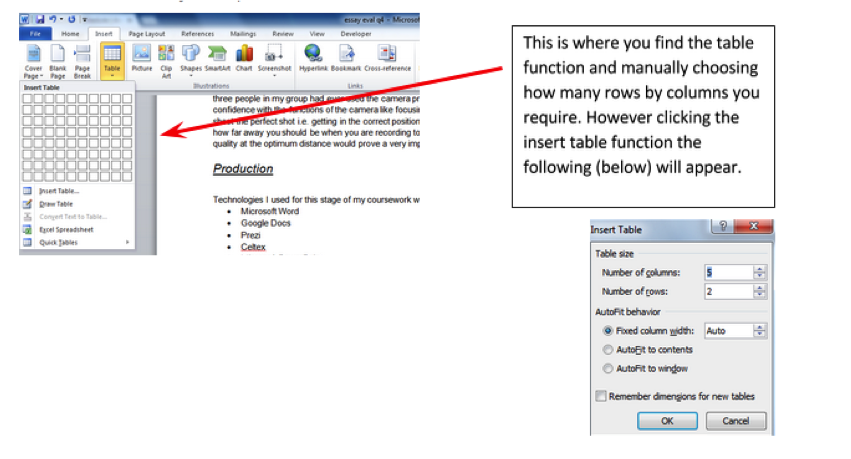
The posts I use the table function is the schedule and the shots list in the production section.
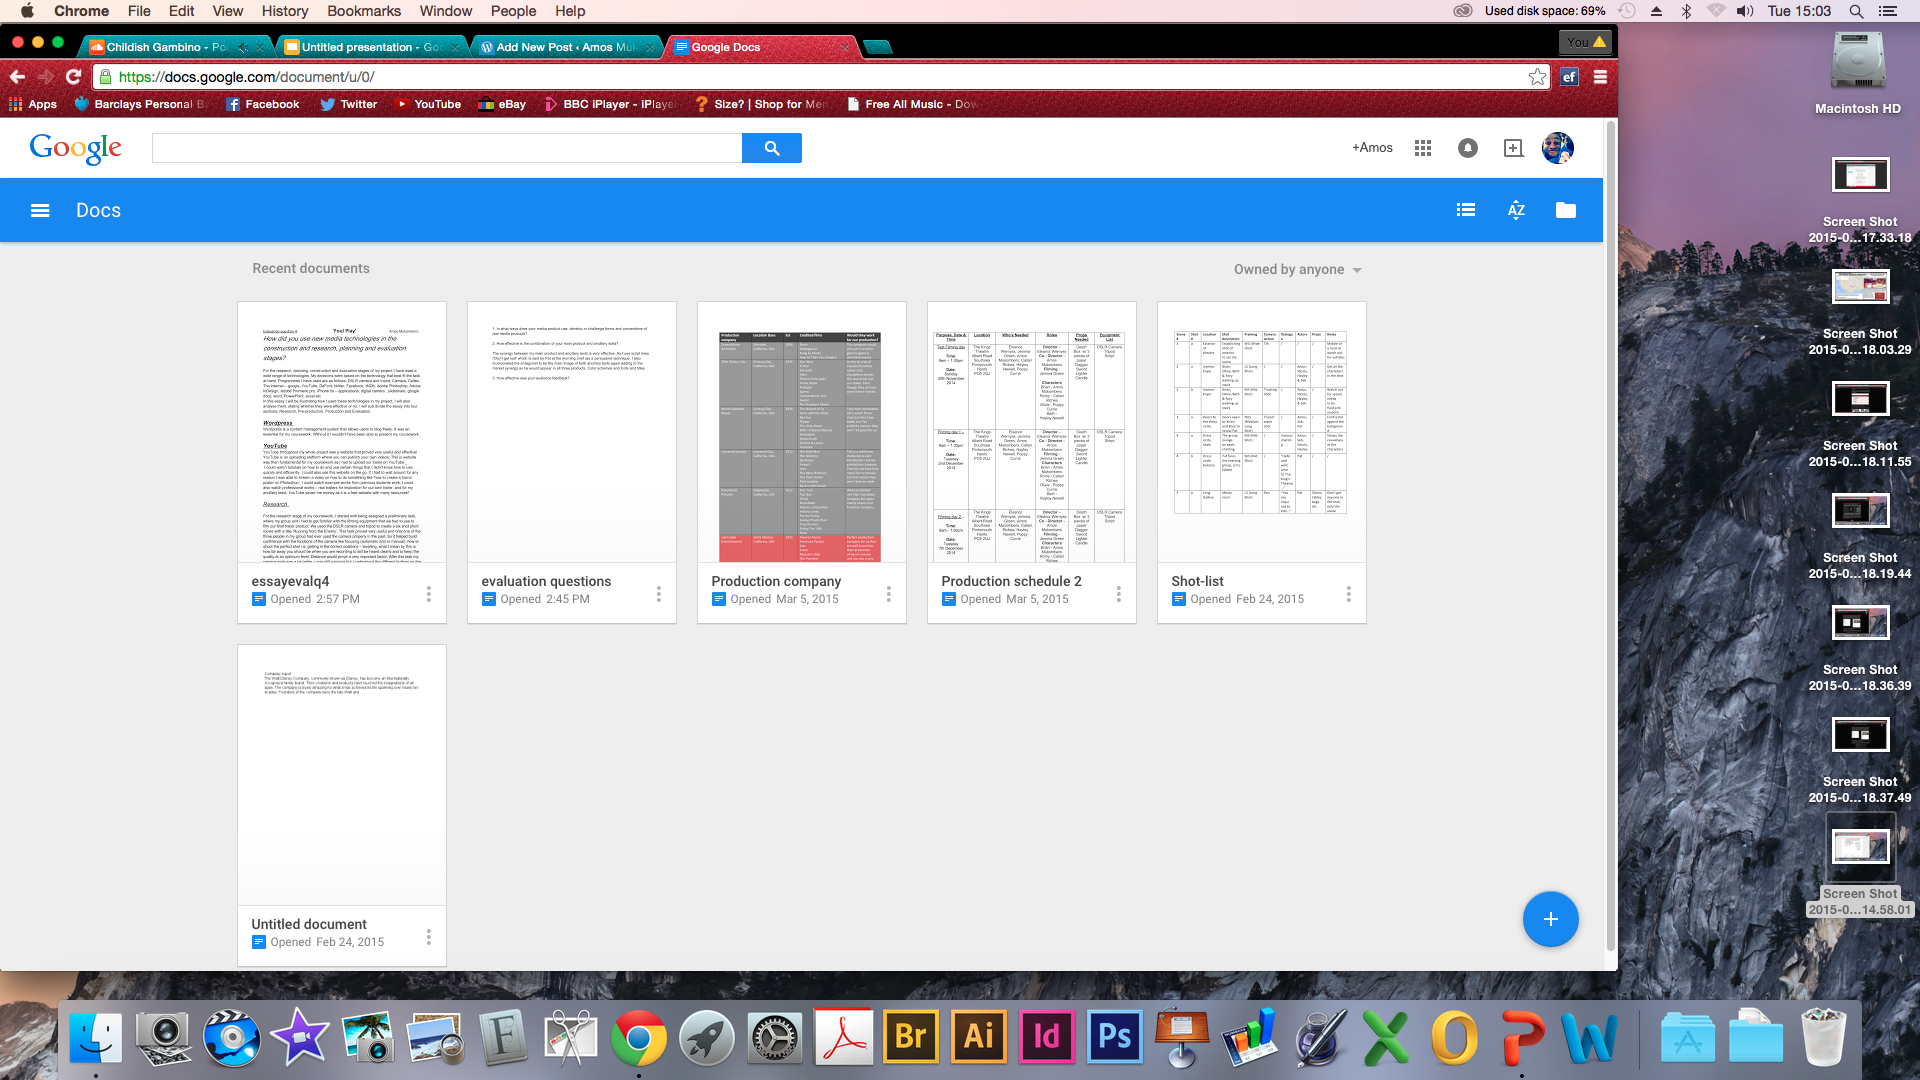
This is what google docs looks like. The documents you see here are Word processed documents. Although you can upload a wide range of documents such as PDF’s, photo’s, PowerPoint slides and Microsoft Excel spreadsheets.
![]()
This is an screenshot showing  what my Prezi presentation looked like. You would use the arrow keys on your keyboard to go through the different areas of the work. Scrolling with your mouse allows you to pan and zoom into a specific area if you don’t want to go through the pre-set order of the presentation.
This screen shot shows my Prezi presentation zoomed out, you can see a few of the parts of my work.

In this screenshot you can see a zoomed in part of the presentation. Each part of the presentation can be seen like this. The good thing about Prezi is it has elements of programmes such as PowerPoint where you can include animations and transitions.
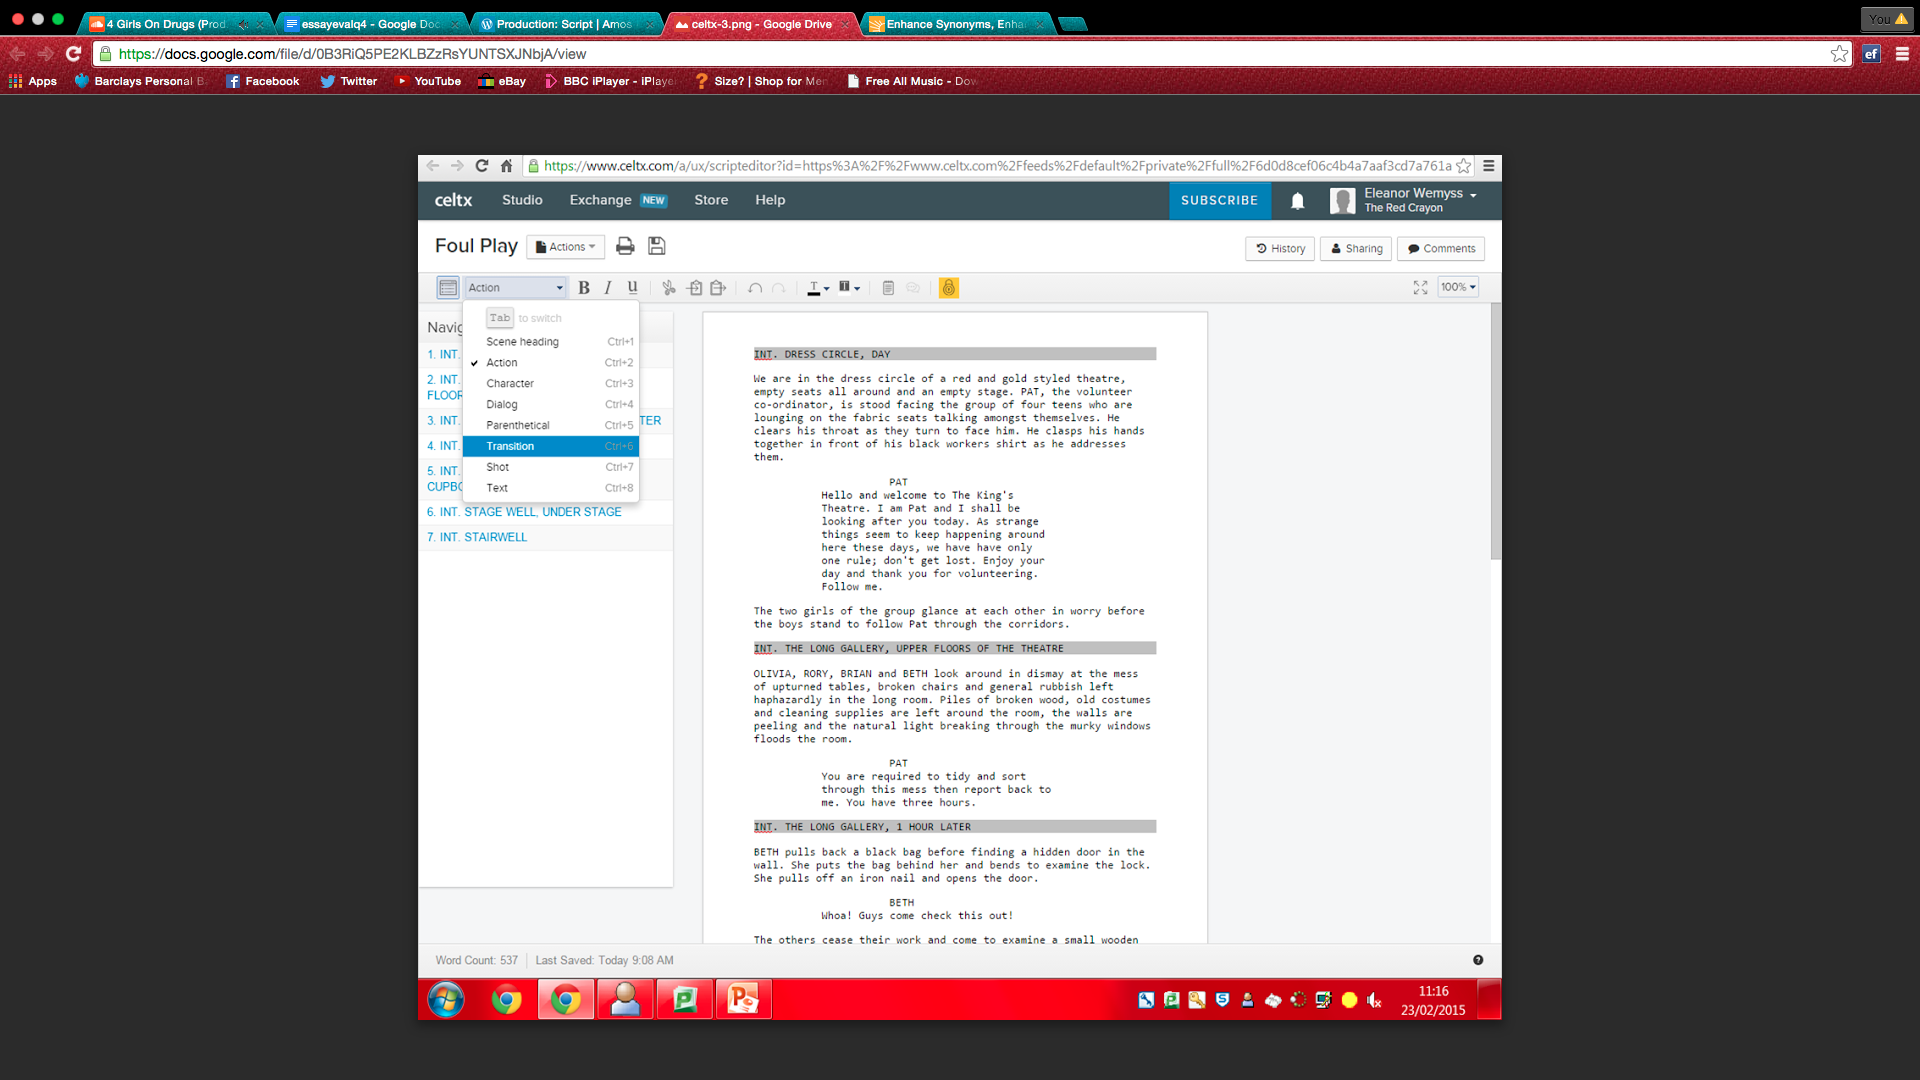
This programme was a great asset to my coursework as we had to create a script. The programme allowed us to strengthen the professionalism within our work. which was perfect for optimising the best possible grades for us. Below is a screenshot of Celtx in action.
“Portable Document Format (PDF) is a file format used to present documents in a manner independent of application software, hardware, and operating systems. Each PDF file encapsulates a complete description of a fixed-layout flat document, including the text, fonts, graphics, and other information needed to display it.” – Sourced from google search.
PDF was also very important for our coursework as it is a file format that allowed us to present a large amount of our work. As we combined a lot of technologies and softwares and presented them on one blog, not all of the file formats with WordPress. So PDF was an effective tool.
I used slide share to upload my powerpoint presentations into WordPress as it was compatible; I was unable to upload Microsoft power point directly to WordPress. So this website proved very helpful in my coursework. I used this website to present work such as – ‘Genre conventions’, ‘Location scouting’, Audience feedback’ and lots of other work. I was able to use the website through my whole coursework.
I used google maps in my location scouting to show what venues we used for filming, Rather than just presenting an address. It also helped us getting to the venue as I could use it on my iPhone to get directions from point a to point b.
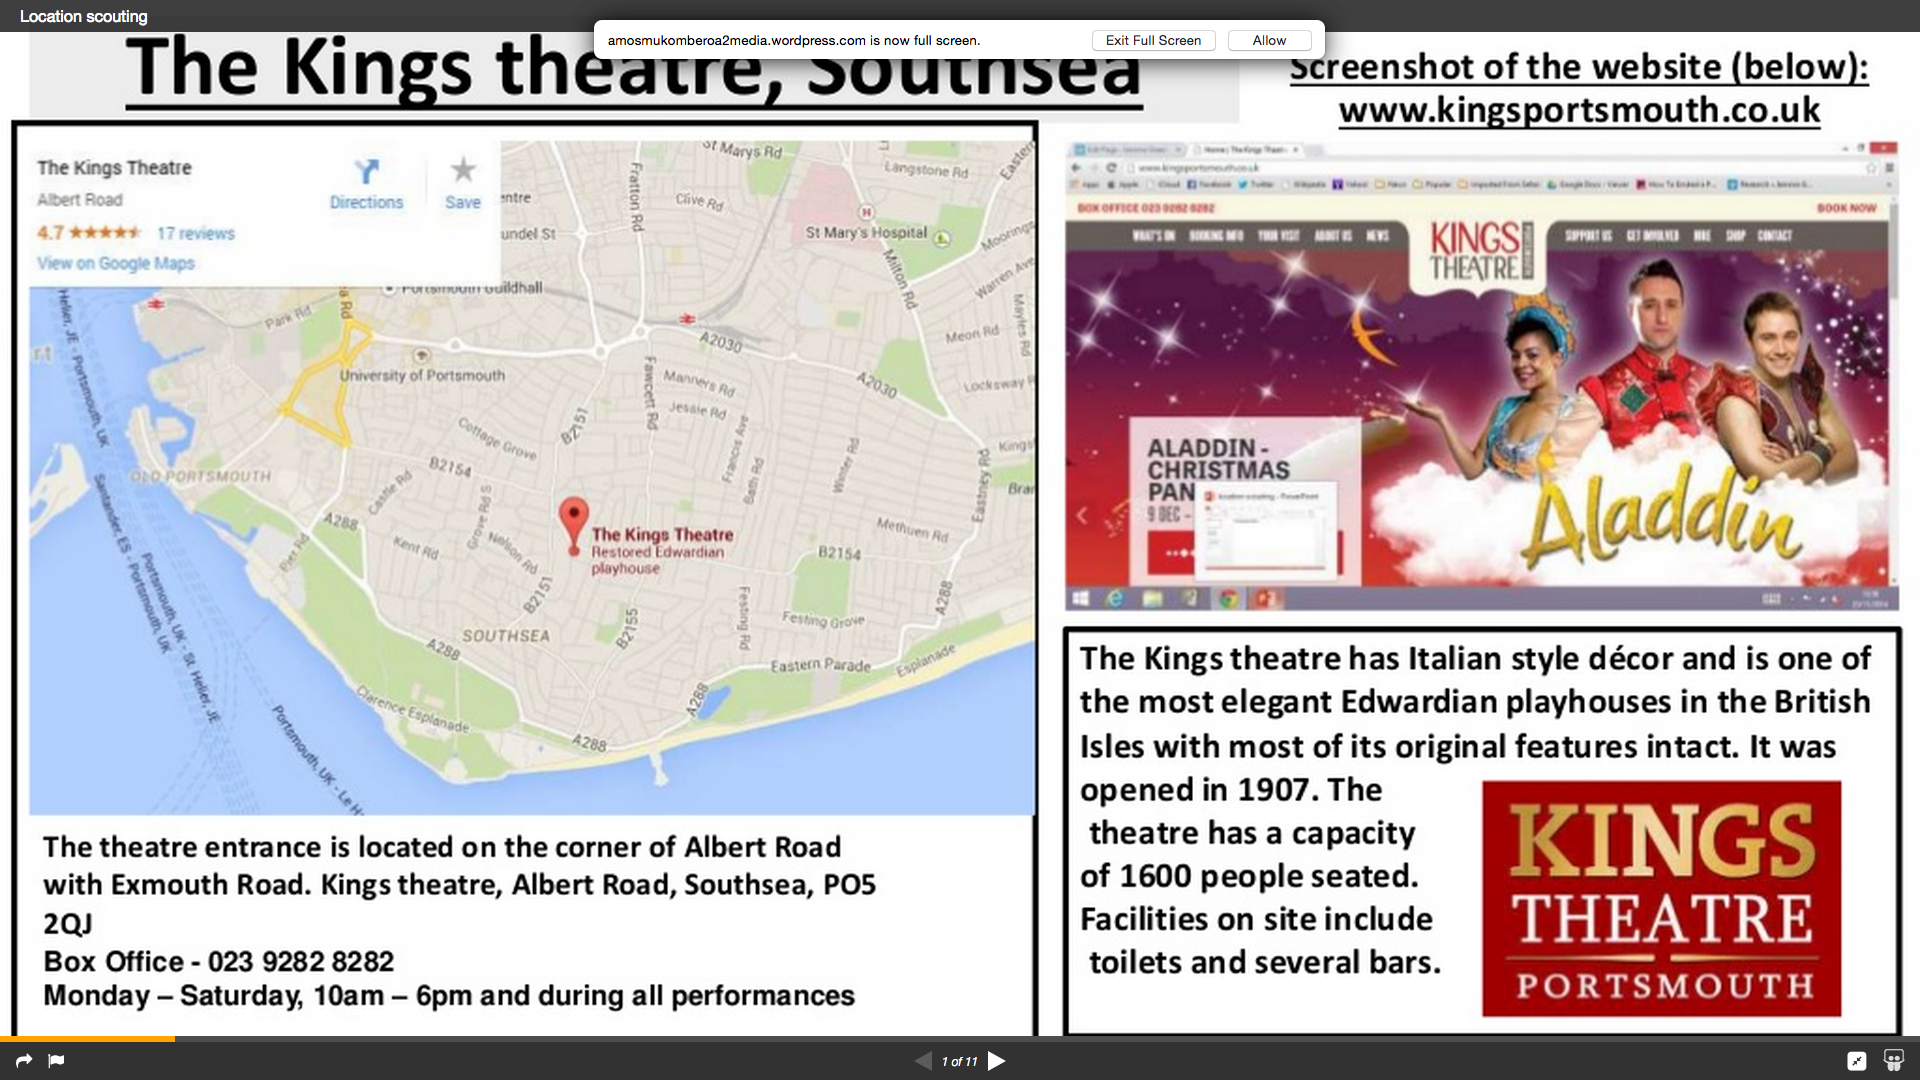
This screenshot shows google maps being used in location scouting. In my coursework.

This is a screenshot showing the use of Dafont in my coursework in the poster creation post.

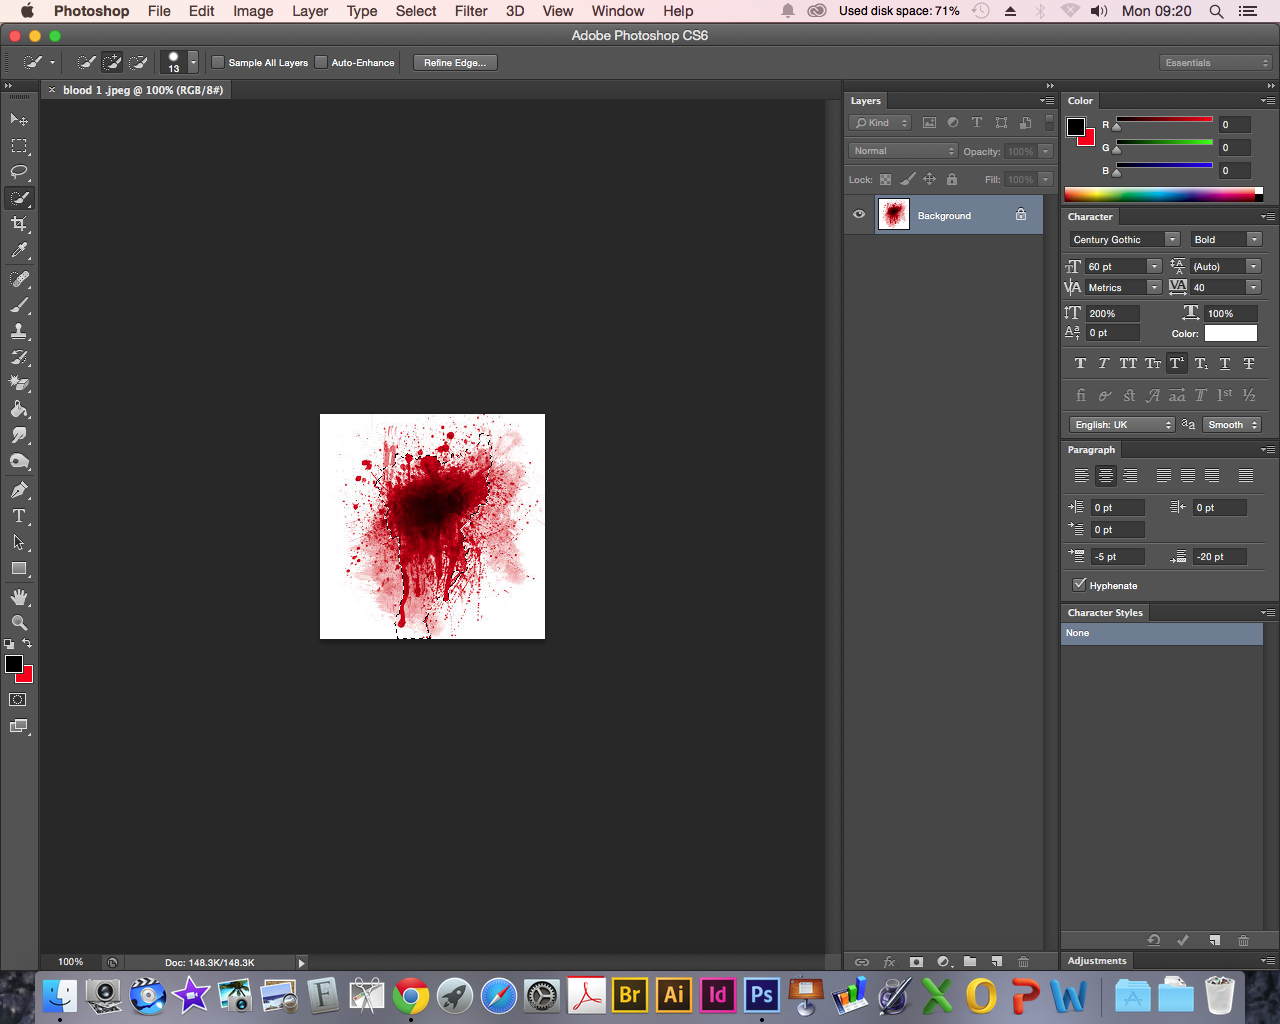
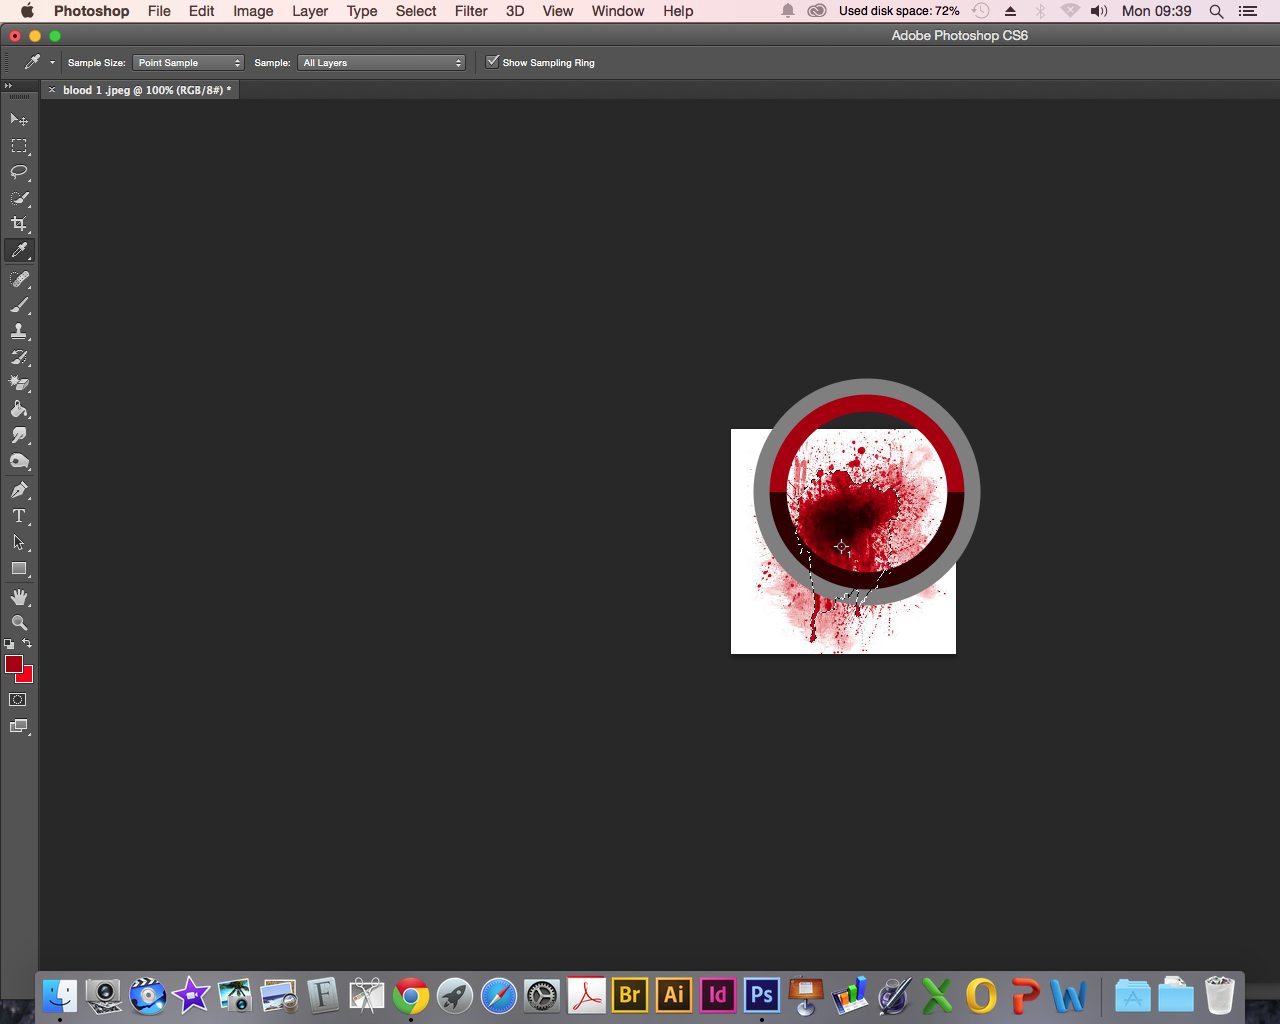
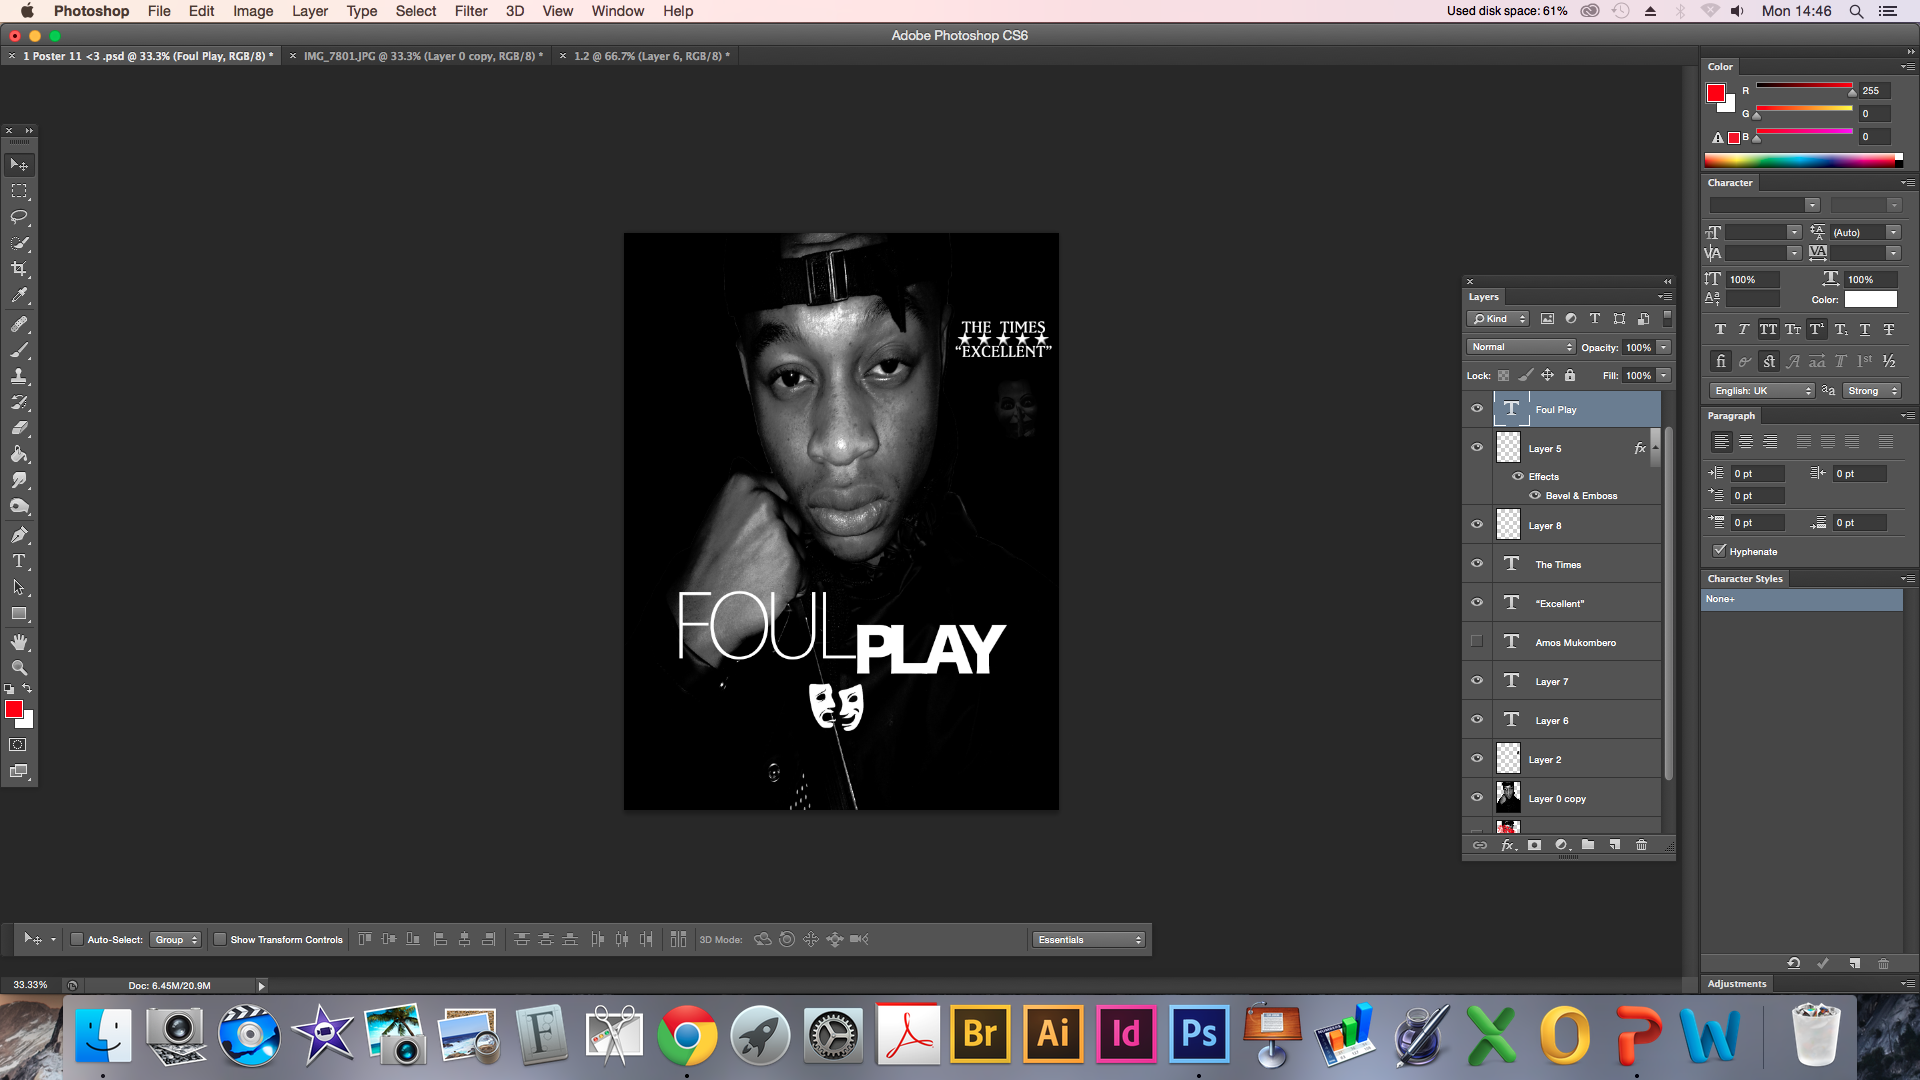
This is a screenshot showing me using photoshop in my magazine and poster creation for my coursework.
Creating custom paint brushes was my favourite skill I learnt whilst using Adobe Photoshop. With this technique I was able to amplify the horror genre by making blood splatter paint brushes. With this tool I was able to make my poster look more horrific. I was inspired by the following video.
URL: https://www.youtube.com/watch?v=Fp5uUC8aLCk
In this trailer they incorporate the blood splatter in their title, using the custom paint brush.
These were the steps I took to create the paint brush:
First of all I had to find a picture of a blood splatter that would work for my custom paint brush. I used the following pictures from google images.

I then had to open a new window in Adobe Photoshop with the blood spatter picture. With the picture I had to select the section of the blood spatter I wanted to use as a paint brush.
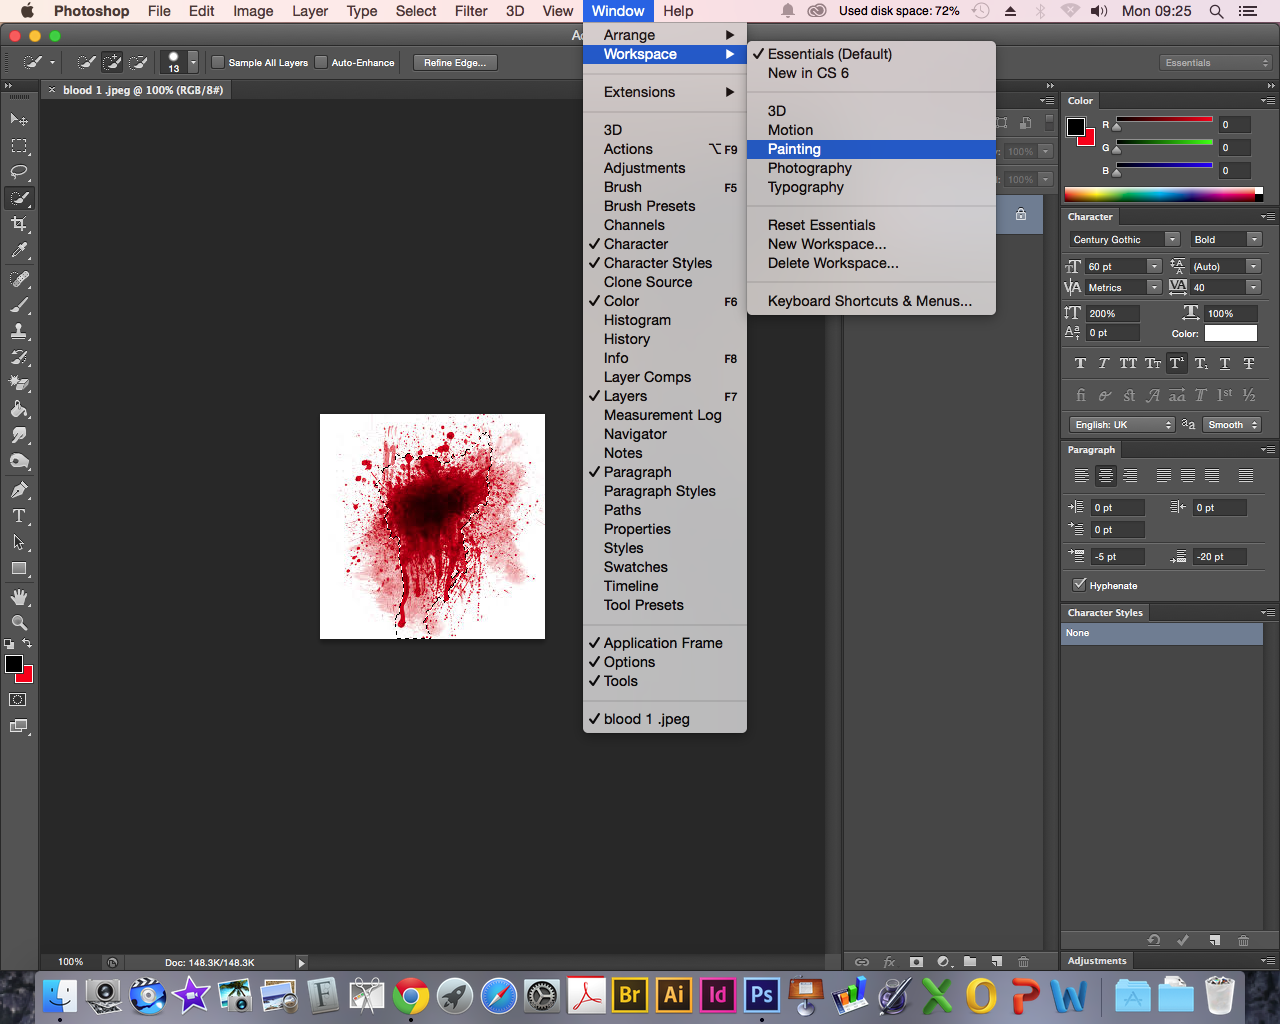
From then I changed the photoshop workspace to the painting This made changing the brushes and painting in general a lot easier.
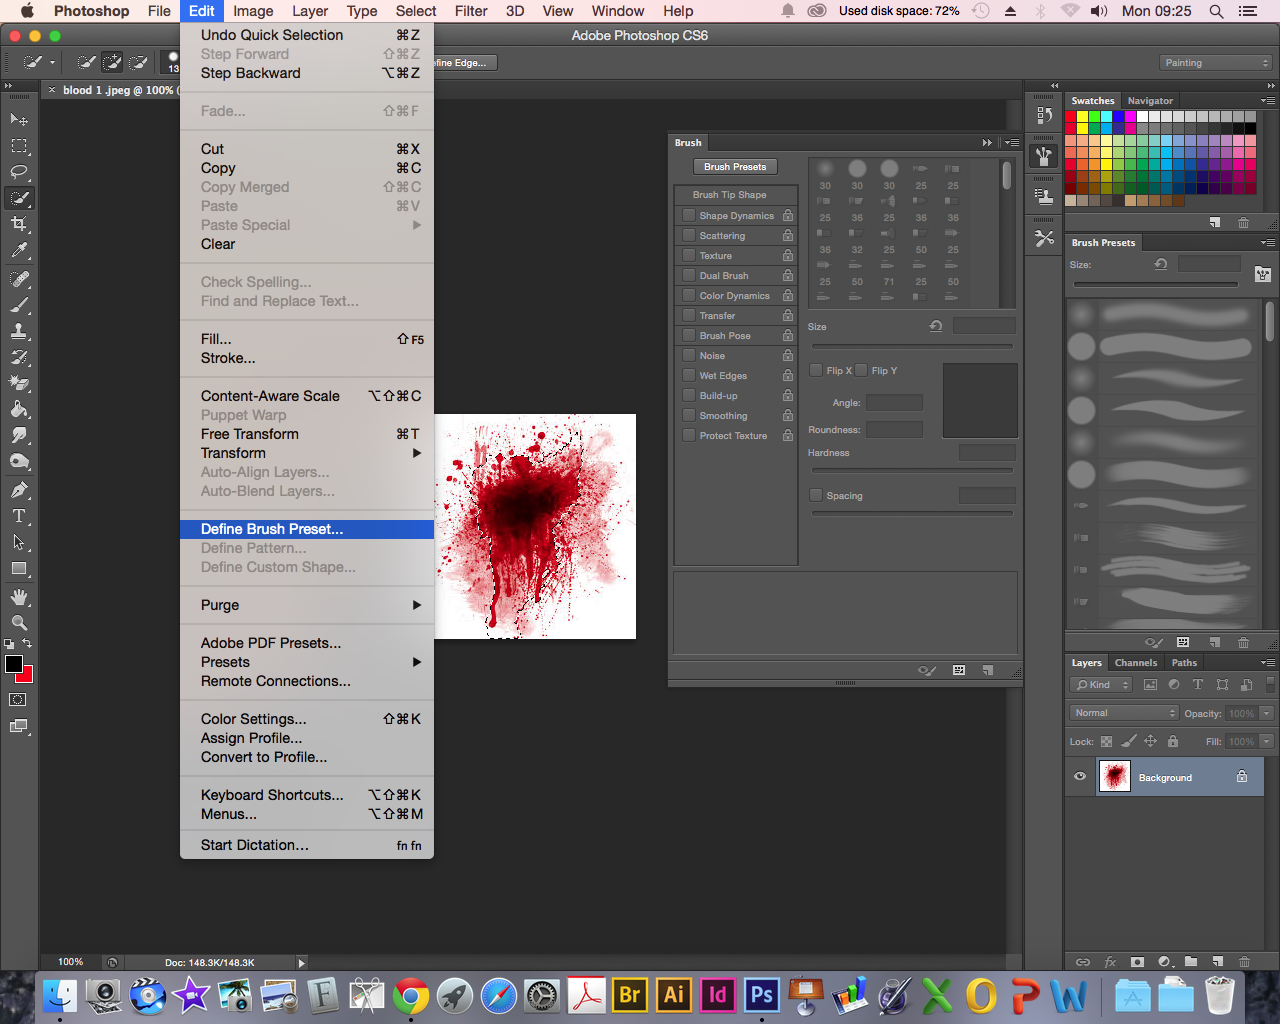
I then clicked on the edit section on the options tab. This is where I found the Define brush preset – to create my custom paint brush.
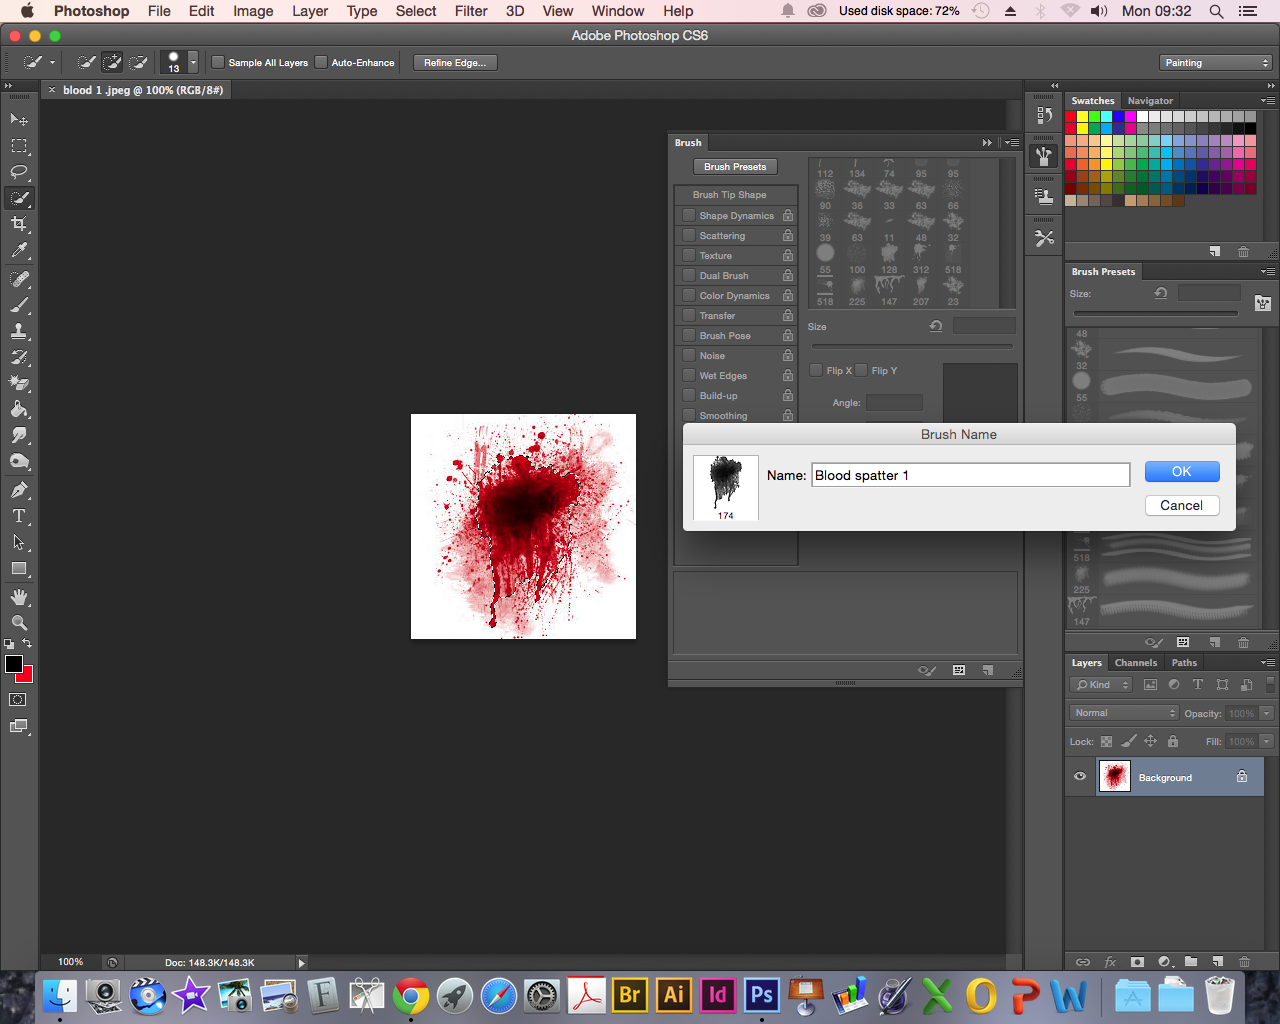
From here I then had to rename the paint brush and then save it to something I would recognise for the future.
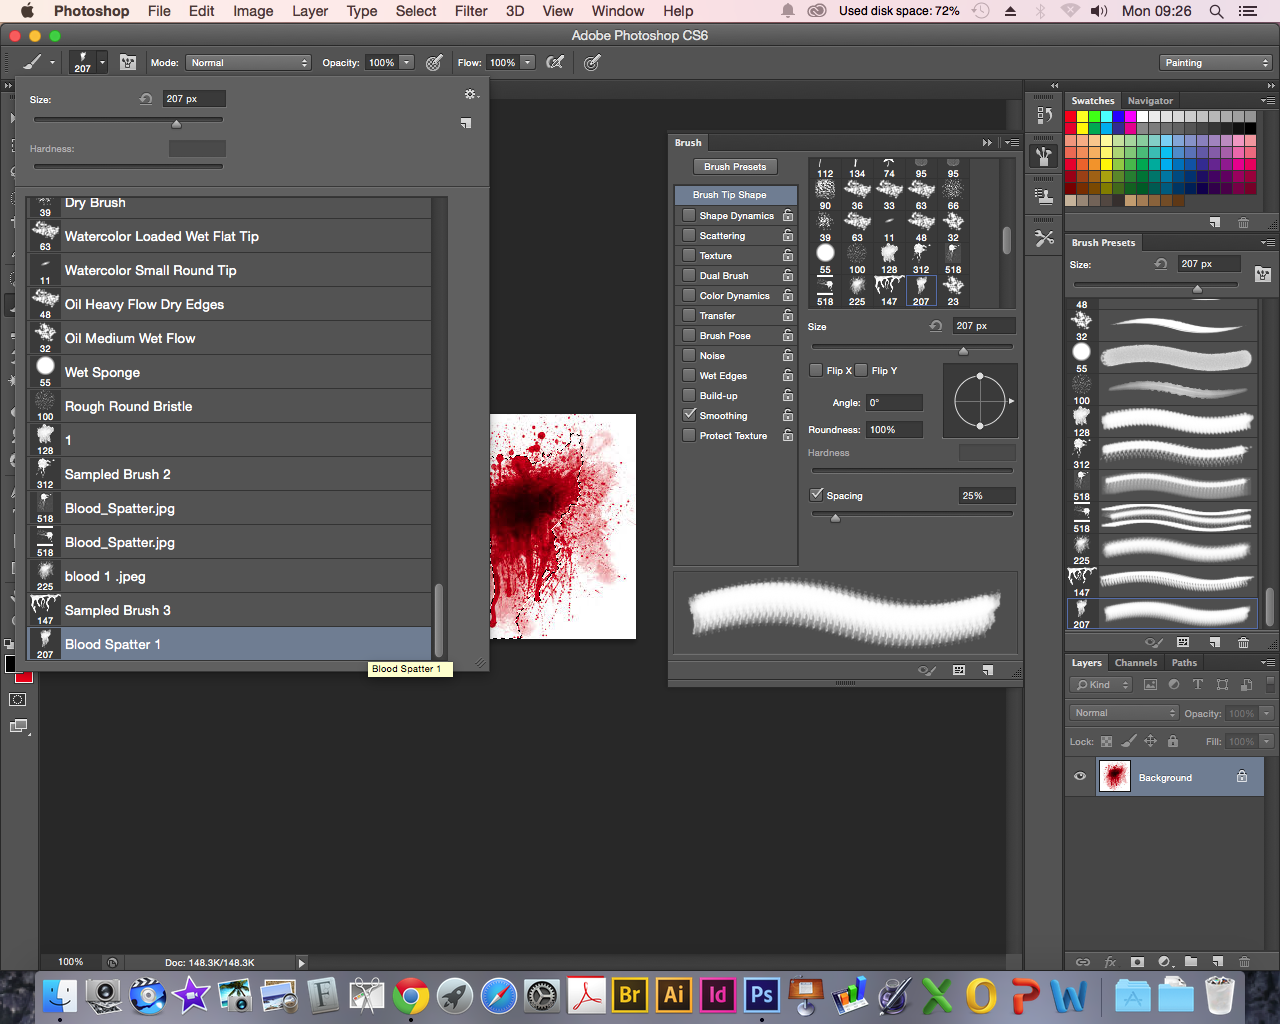
To use the new paint brush I had to click the drop down menu for all of the different paint brushes and scroll down until I found the new paint brush that I had created. At first the paintbrush was black but then I changed the colour to red. To make it look more like blood I had to change the shade of red to darker or lighter depending on what it looked like. I used the video as a guide for the shades of red. I could also switch between tabs on photoshop to use the eyedropper tool so I could get my blood to look as realistic as possible.
To used the eyedropper tool I clicked on the tool and changed windows to the blood spatter one and sampled different parts of the blood to make it look as realistic in colour as possible. If i clicked and held a filter would show the difference in the current colour to the new colour I would be changing to.
I also used this technique for my ‘Foul Play’ title. This use of technology was very effective for making my poster as blood is very conventional in horror based products.

This screen shot shows me using Facebook messaging in a post on my coursework. Where i am sharing pictures.
For the evaluation stage of my project I decided to answer the pre-set questions with a different technological presentation technique. The reason for this was to show my technological abilities in an effective manner.
For question one I used Powtoon – which is an alternative to a powerpoint presentation, this was a fun interactive way to present information. I was able to use a variety of animations to make my work come alive. Powtoon also enabled me to use a wide range of multimedia operative such as pictures, text, video with the combination of music. This is an effective use of technology as it spiced up my work. The plus side to this programme is that you don’t need to be a professional to create professional looking work, that is why I enjoyed using it.
For question two of the evaluation I used Microsoft Powerpoint, I found that analysing the combination of my media products worked effectively using powerpoint using a series of pages and slides. Again with powerpoint I had the ability to use a range of multimedia making my work more aesthetically pleasing.
For the third question I decided to create magazine pages using the software Adobe InDesign and I enjoyed creating them in my AS year of this media course. I found it was better than finding another on-line presenting tool as there are a vast amount tools and features I could choose from! InDesign is a professional software that allowed the quality of my work to be at a high level.
For the last question I decided to write an essay using Microsoft word, this was effective as it allowed me to layout my essay in a simplistic and junk free manor. Technology is forever improving with the time and proves to play a massive part in our everyday lives. For my coursework I was able to use a wide range of technology to complete tasks, present work and communicate efficiently and effectively. All technologies I have used in my coursework have been very effective and helpful. Without it I would have been able to acquire the range of research material as was available to me and to present and create some work.
CLICK IMAGES TO ENLARGE
This double page spread is for my magazine stage.

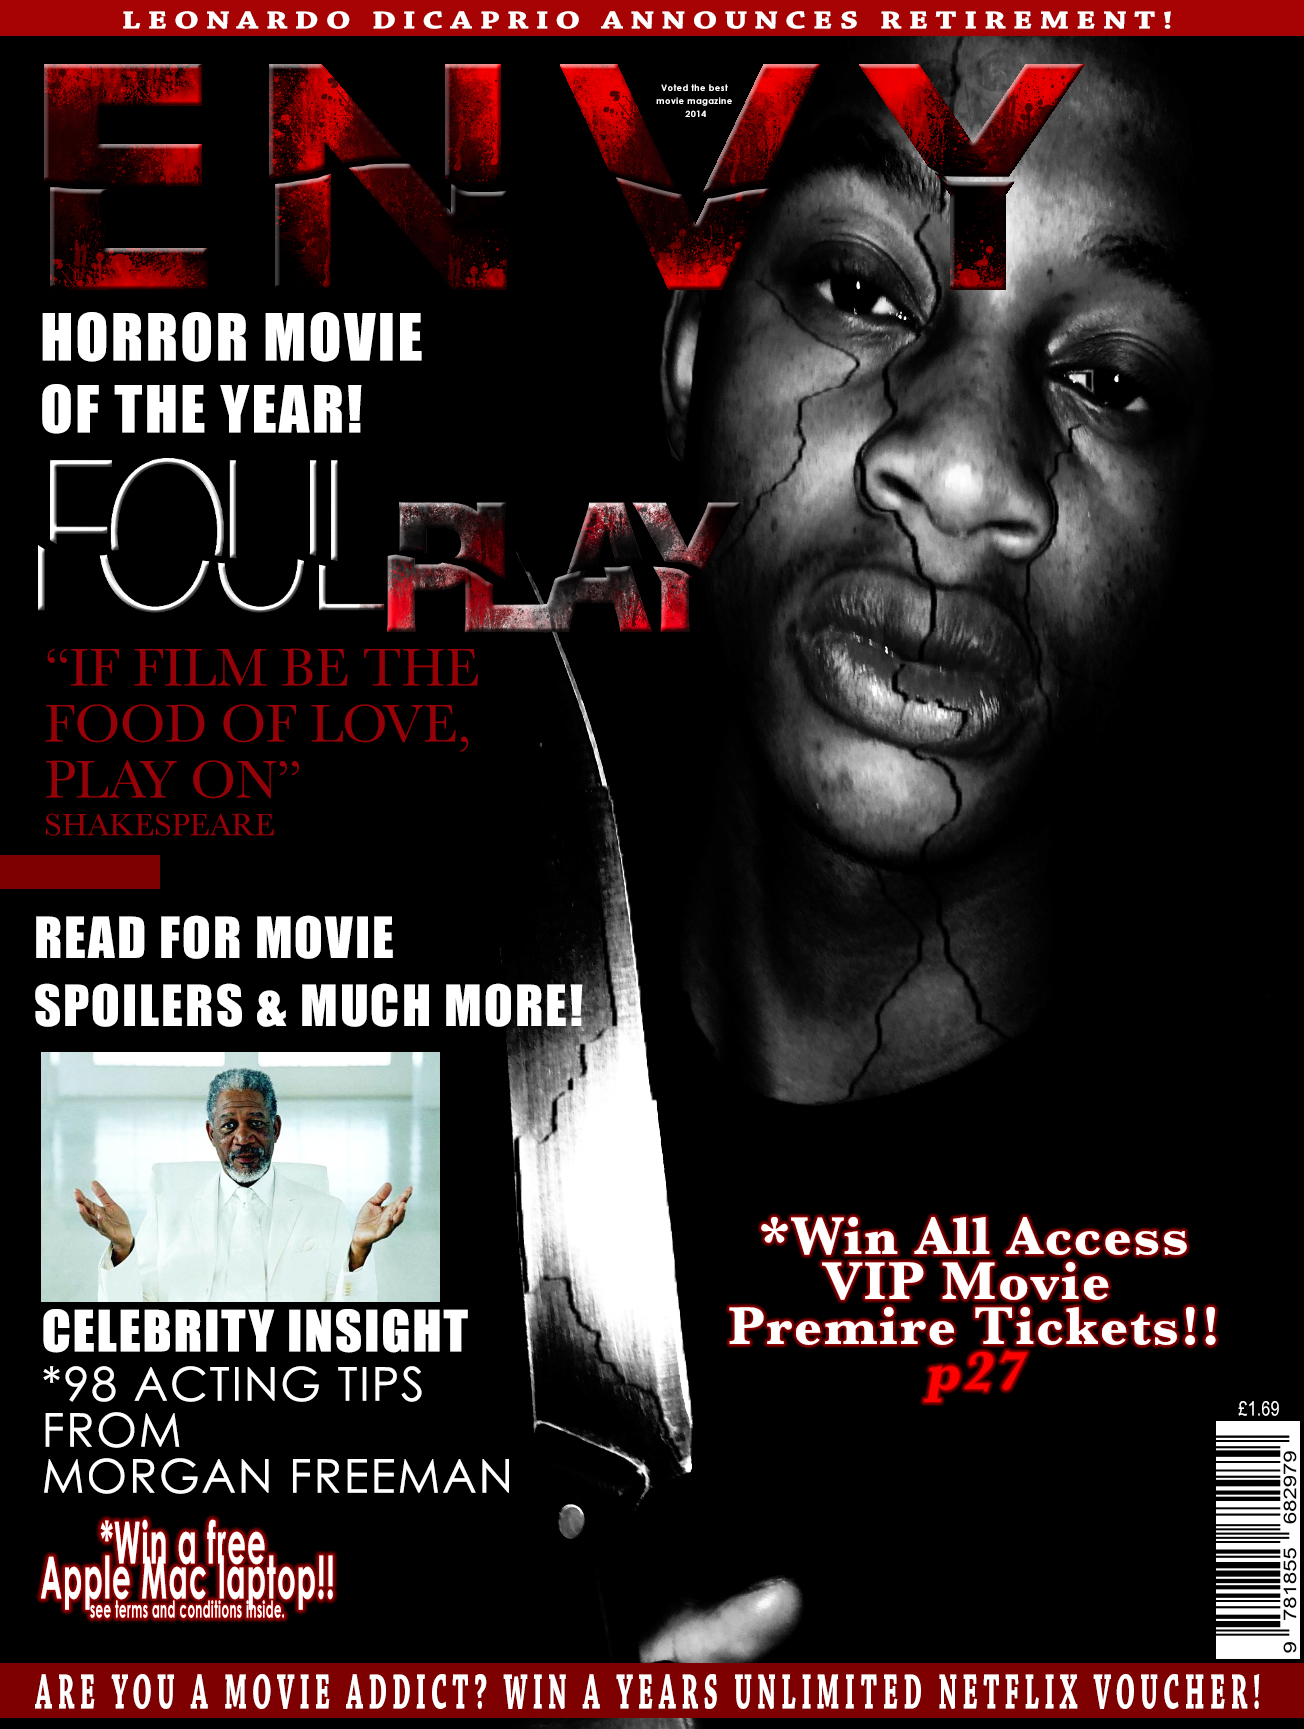
This double page spread is for my poster stage.

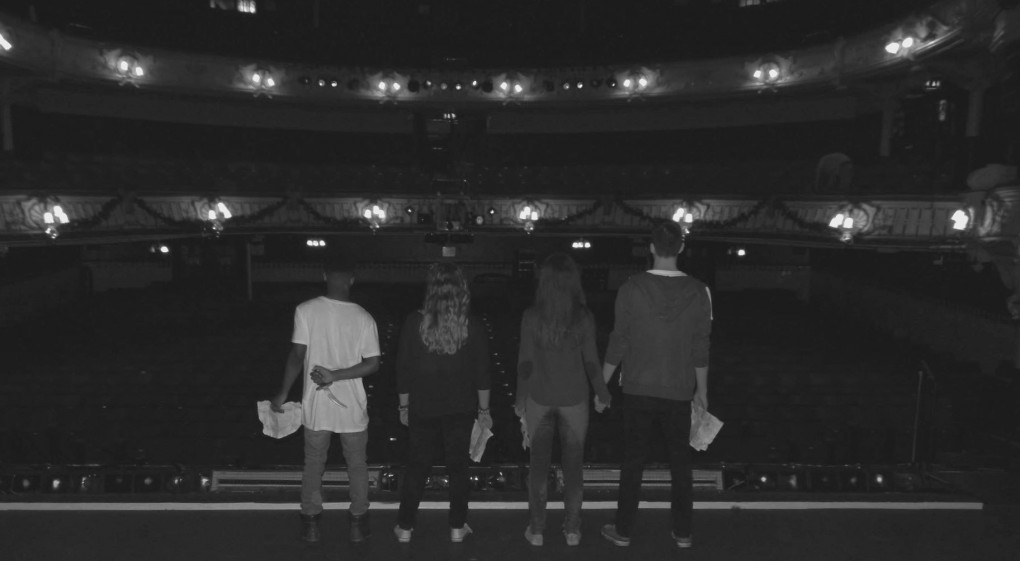
This normal magazine page is for my trailer stage.
This is Eleanor’s Facebook audience feedback.

This is Jemma’s audience feedback powerpoint.
This is the video I created for my audience feedback
Hi there guys, Amos Mukombero here. This is a video response for question 3 in my evaluation stage of my a2 media coursework
Audience feedback has taught me a lot thought my coursework in the sense that i am not making the products for myself and my own liking but am creating it for my consumers and target audience. So meeting their expectations, wants and needs was an essential in the creation of all of my products. I made sure that my audience’s interests were at the top of my priorities above all else.
I mainly gained feedback for my ancillary texts and my main product. I set my target audience age for 12-25 if a mixed gender, so to optimise my work and to fulfil their needs getting feedback from this circa was effective in order to make my products perfect for them.
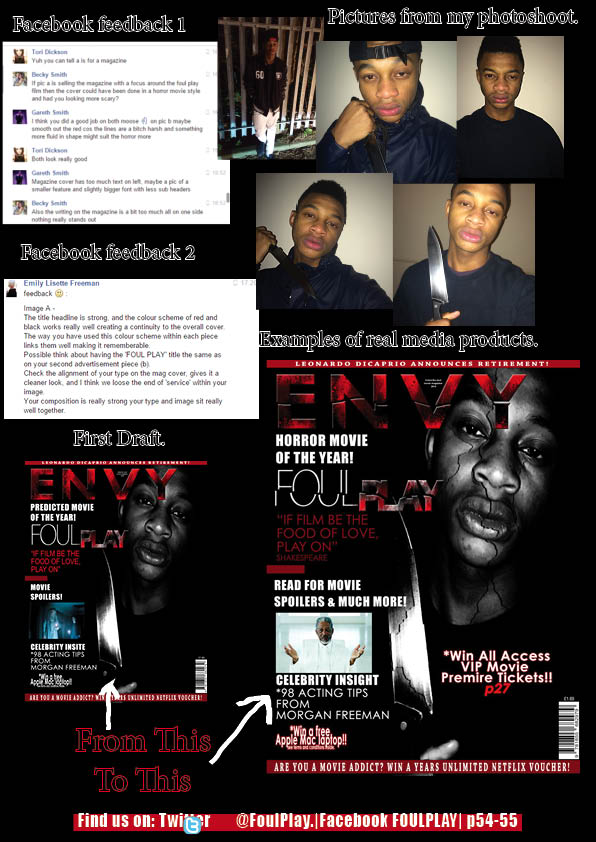
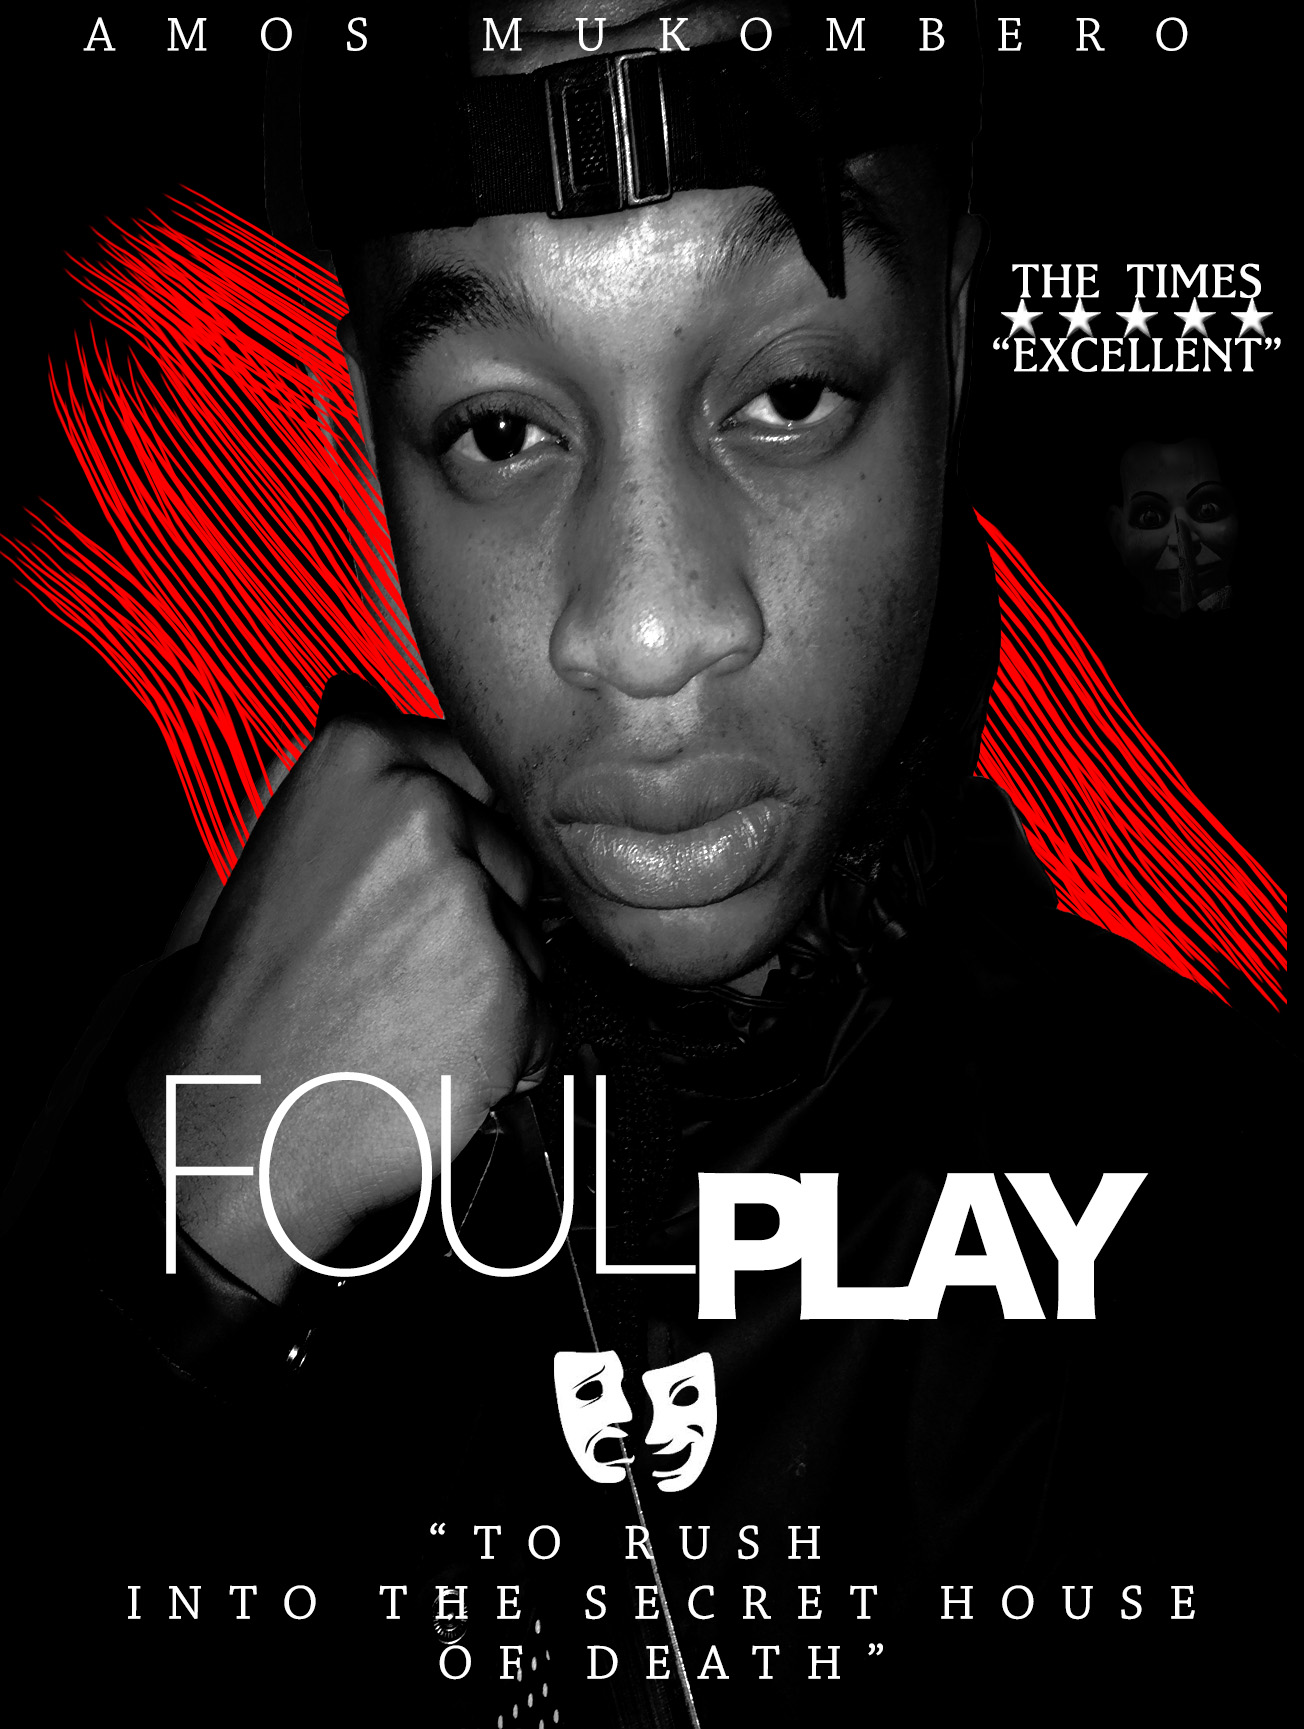
I’m going to get straight into it so here we go the first feedback I received was for my poster after verbally asking my lecture. before this feedback I was certain that the main image for my poster would look like this.
His response was (make this feedback a readable title page)
“You need a new image with a focal point. Right now as a consumer of your product I do not know where to look.” He carried on to say, “It needs to be more intense to lure your audience in and adding a supernatural and distorted element would help with connotations of the type of film that you are advertising”, he lastly advised me to research current real life examples for inspiration.
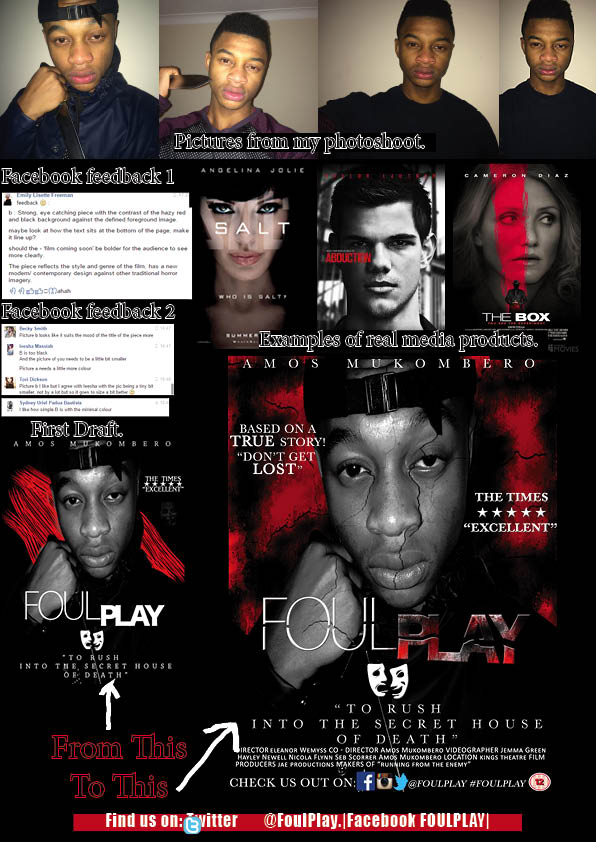
I found this feedback very effective as it made me realise how unconventional my poser was and how unfocused it resulting in my audience looking past it, it wouldn’t grab anyones attention. From this feedback I went away and set up a photoshoot to acquire a new main image here were the outcomes.
I then kept a few elements of my first drafted poster and constructed them around my new image. The elements I kept the same were The times rating, the eerie dissolved face and the theatre masks.
From this I then noticed some of the elements didn’t work so I had to follow a conventional poster for guidance. Research into real media products – The posters I used for guidance were as follows:
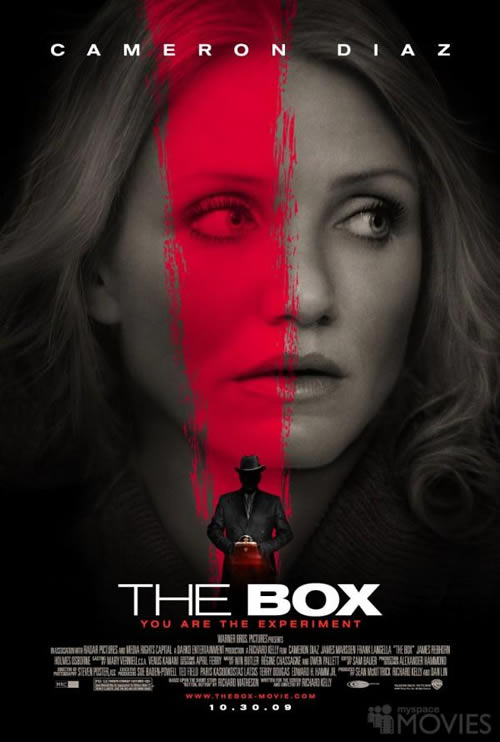
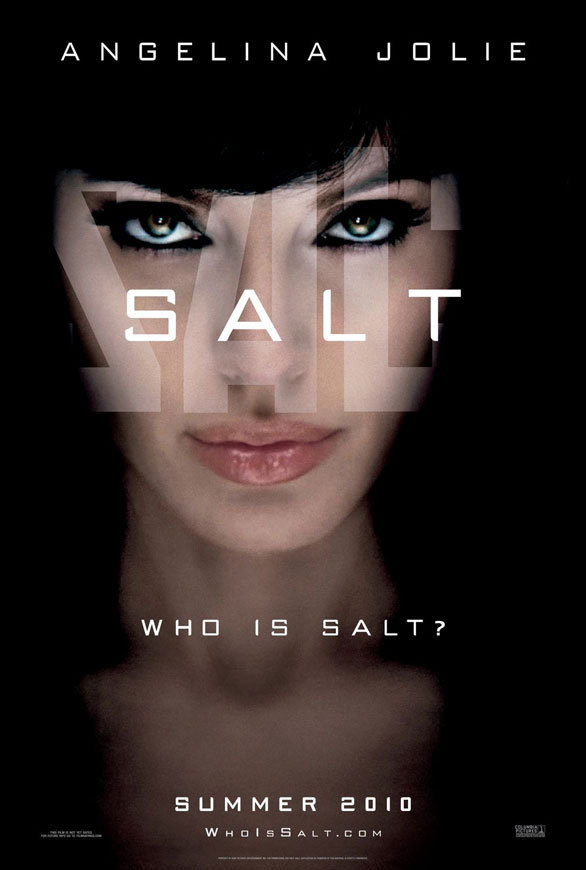
Using these pictures I constructed this draft of my poster
From this draft I figured as I have changed the whole feel of the poster more feedback was needed so I thought I would use the well know social networking site Facebook to gather an audience that is specific to my target audience to give me feedback on my poster as I’ve said before they are the people I am making my poster for; their feedback is vital for my potential success
This was what I wrote to brief my target audience.
![]()
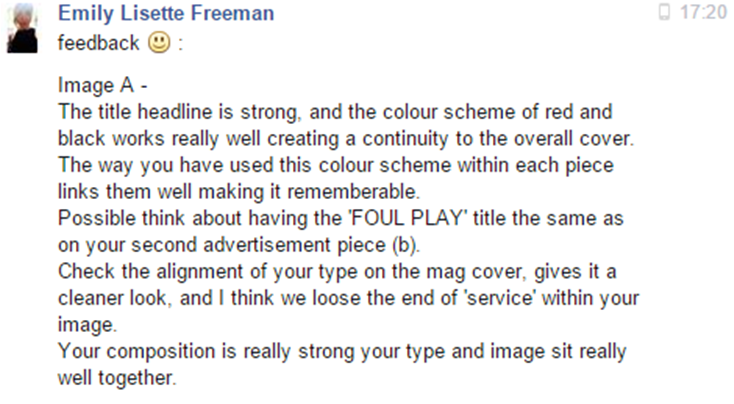
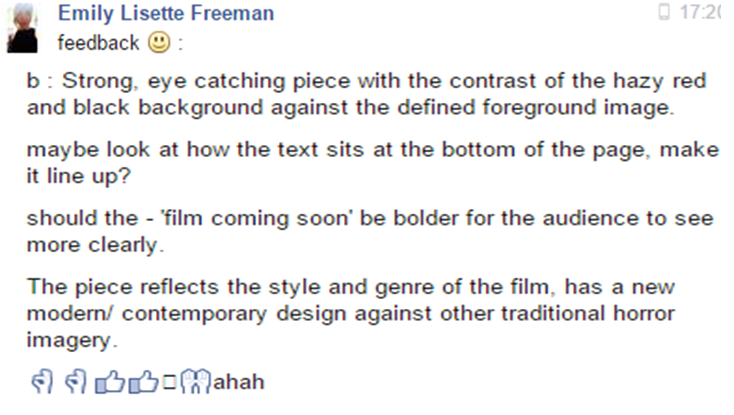
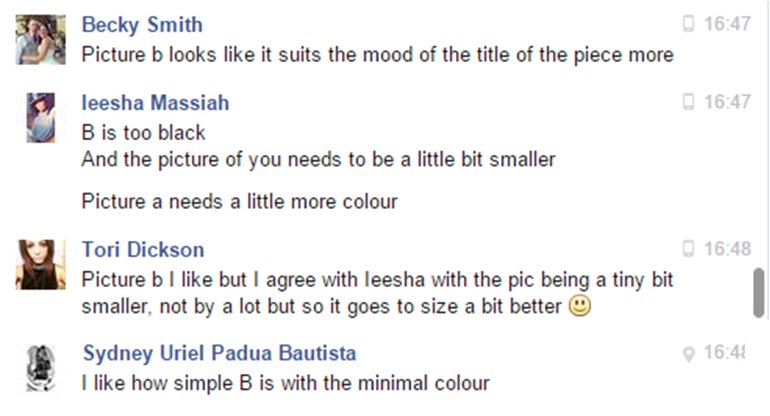
This was my feedback (make this a title)


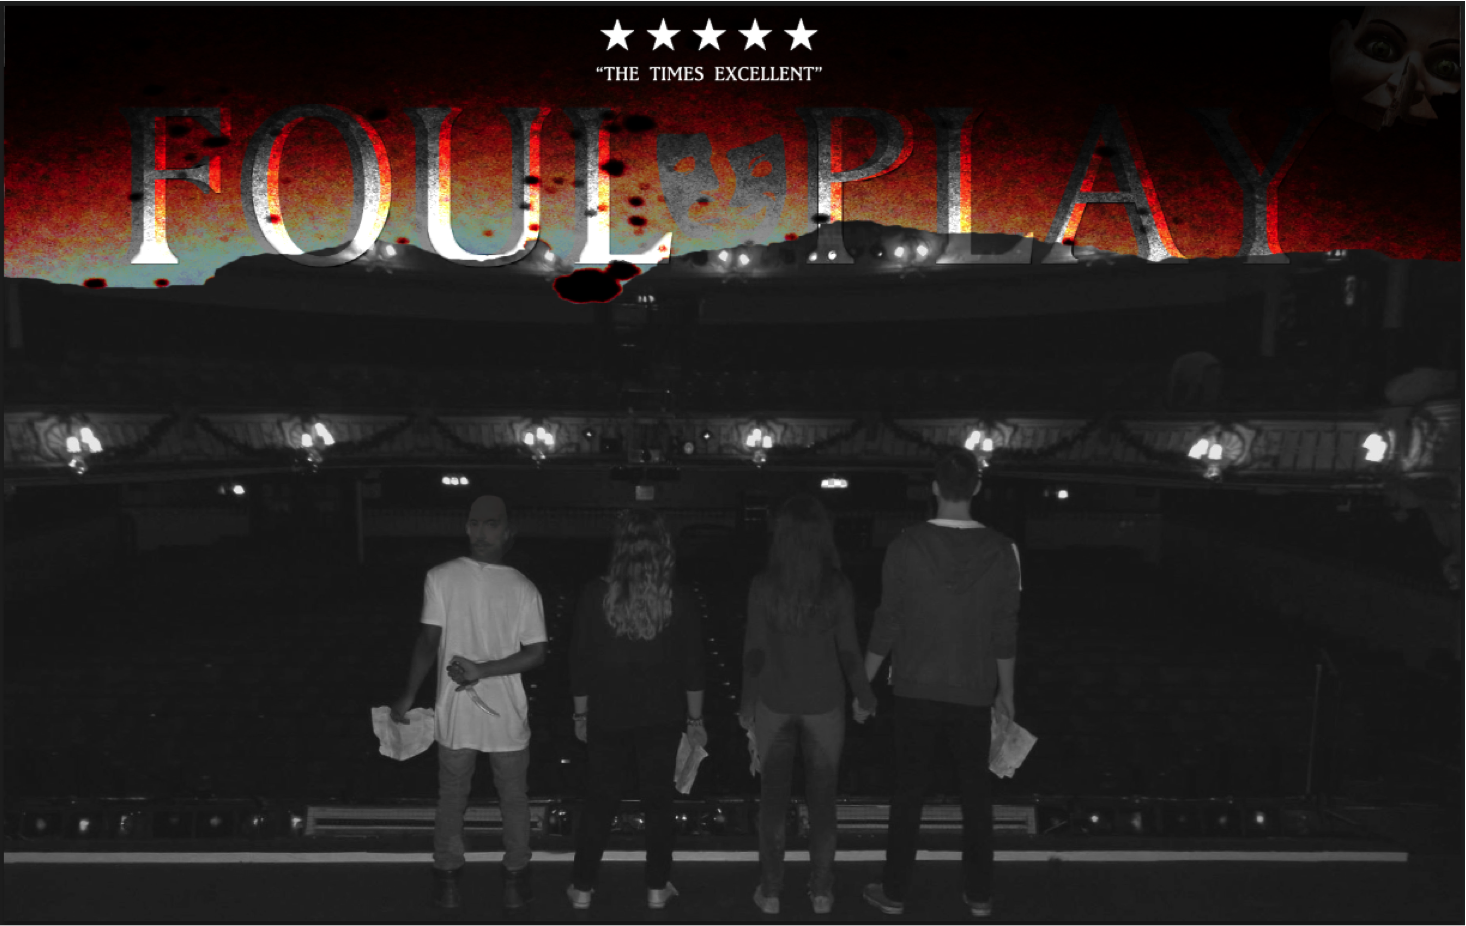
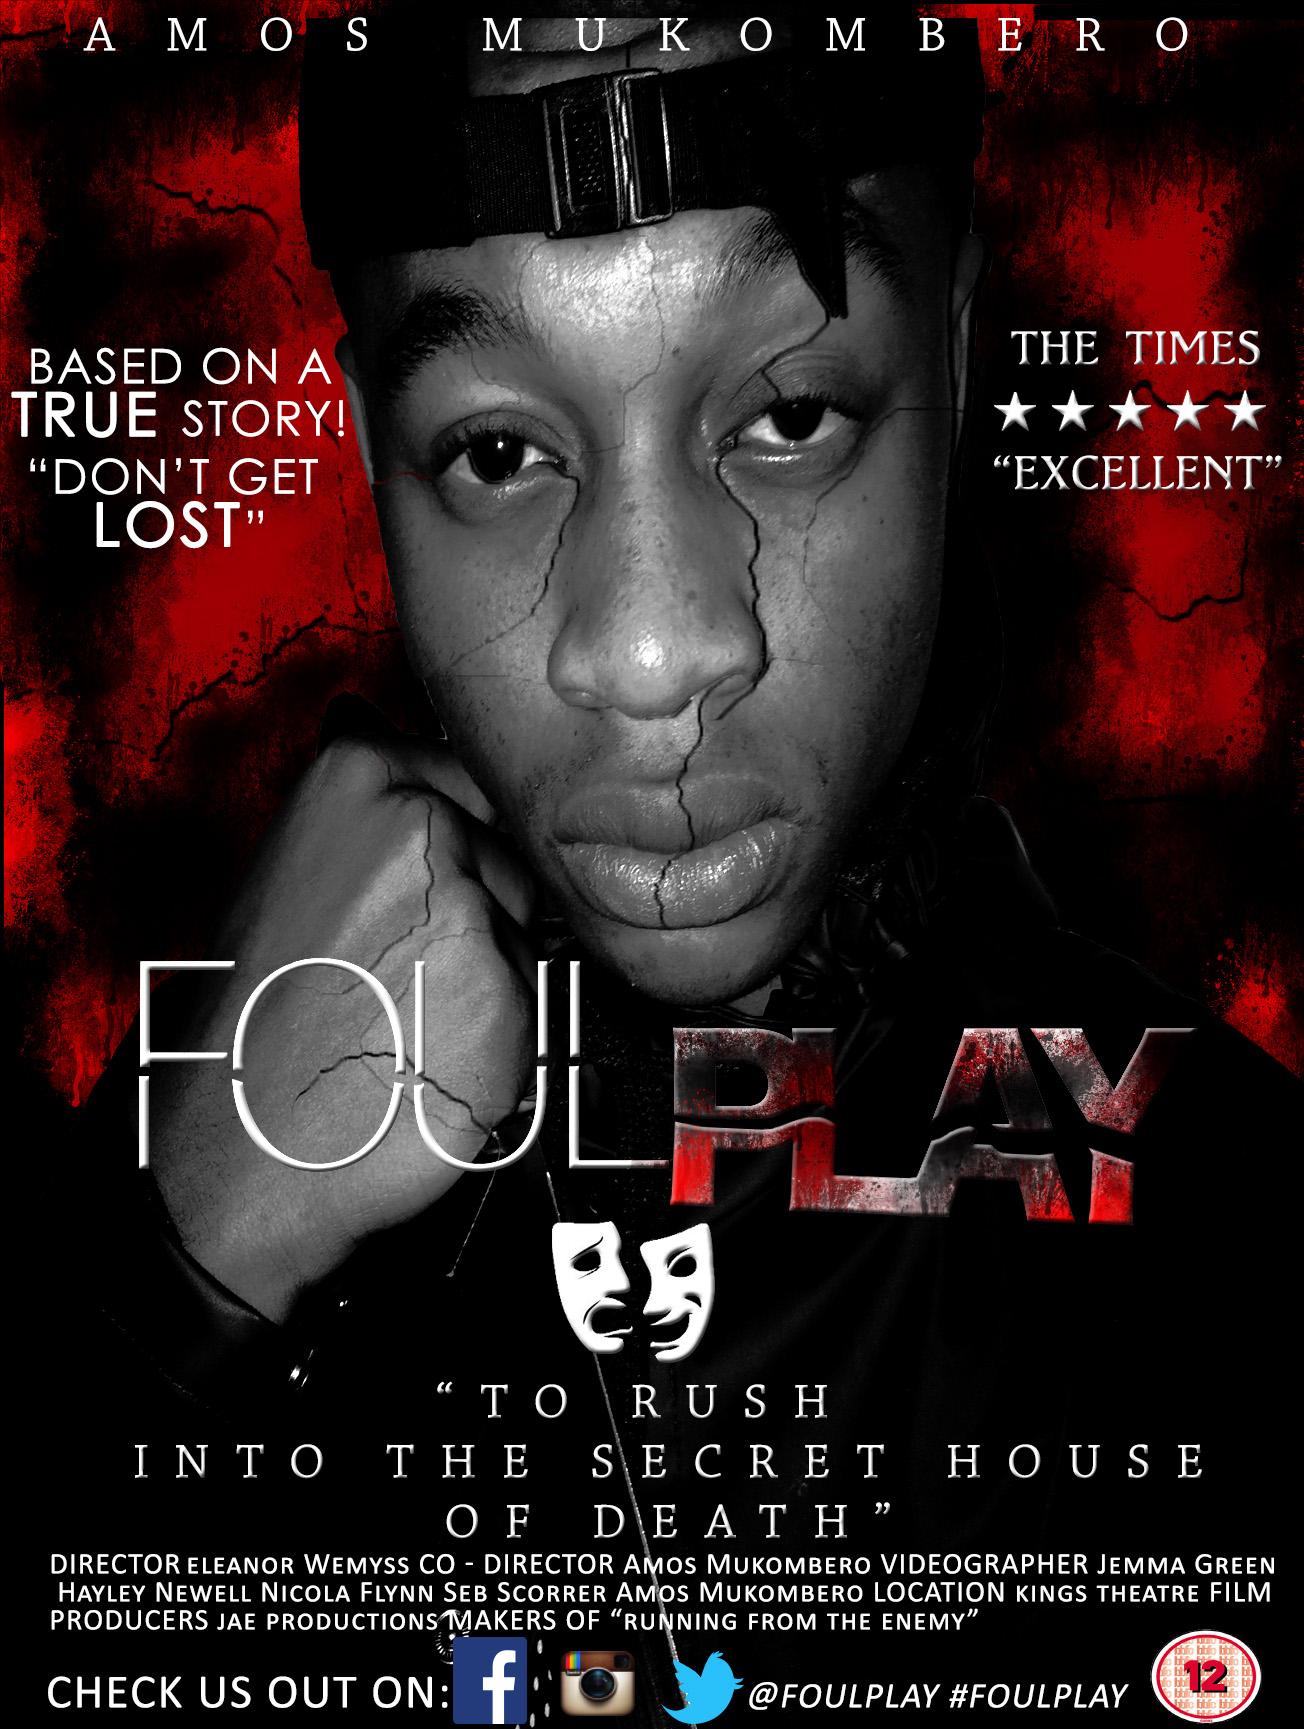
I agreed with the majority of the feedback so from this I changed a lot of my poster here was the outcome, as a whole I found the poster looked a hell of a lot better and it fit the conventions of a real media product. It had a focal point – the eyes of the antagonist.
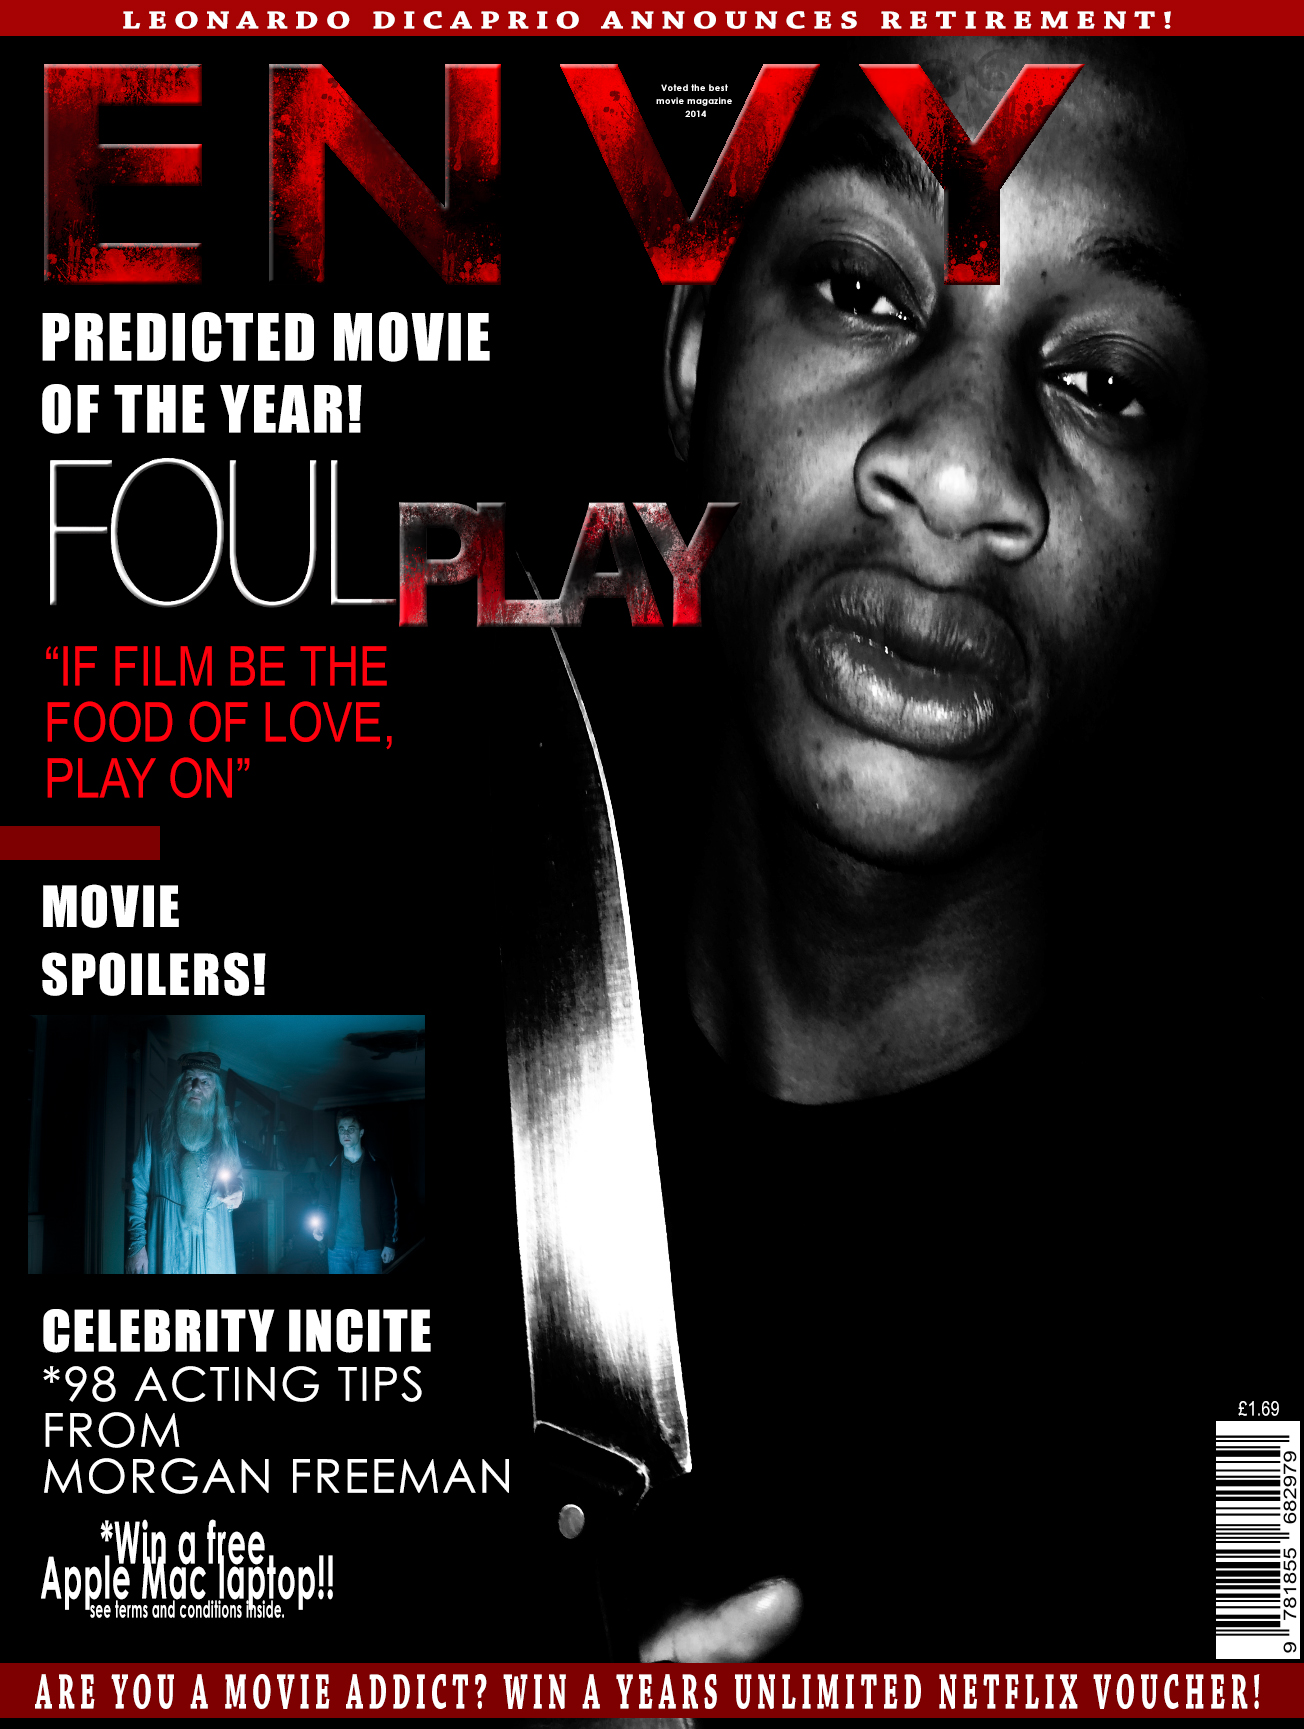
I undertook the same procedure with getting feedback on my magazine as I did with the poster, however I got feedback from my target audience first and then asked my lecture. The first draft of my magazine – the draft I gained my audience feedback on was this.

Feedback I received from my target audience on Facebook was as follows…

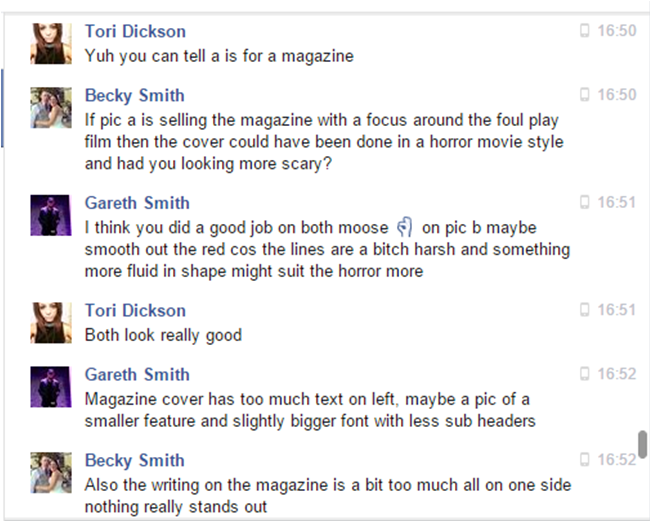
This feedback proved very influential as the consensus was that my magazine didn’t have any horror connotations, I needed to include more horror elements. I took this feedback on board and I changed the image so that it fit my genre more. I also minimised the story lines on the left hand side and moved them in as they are too close to the edge. Another change I made because of the feedback was the ‘Foul Play’ I kept it the same format as my poster to embrace synergy in my products. I lastly changed the background colour from white to black so that it fit my chosen genre.
This was the result of me changing my magazine from the audience feedback I received…
Feedback from my lecture was very important as he is an expert of the field and has seen many constructions of magazines in his time so I was confident in his judgements!
The feedback I received from my lecture was – ( make this a title page)
“The harry potter picture didn’t have a clear link or significance to the overall magazine so he said to change this to make it link with the magazine more by either changing the picture so it had reference to the story lines or finding a picture that fit with the storylines. Another point was the main picture was bland and had no substance, I needed to make it more distorted and more sinister. Also the right side of the main image needed to be filled”.
This was the outcome.
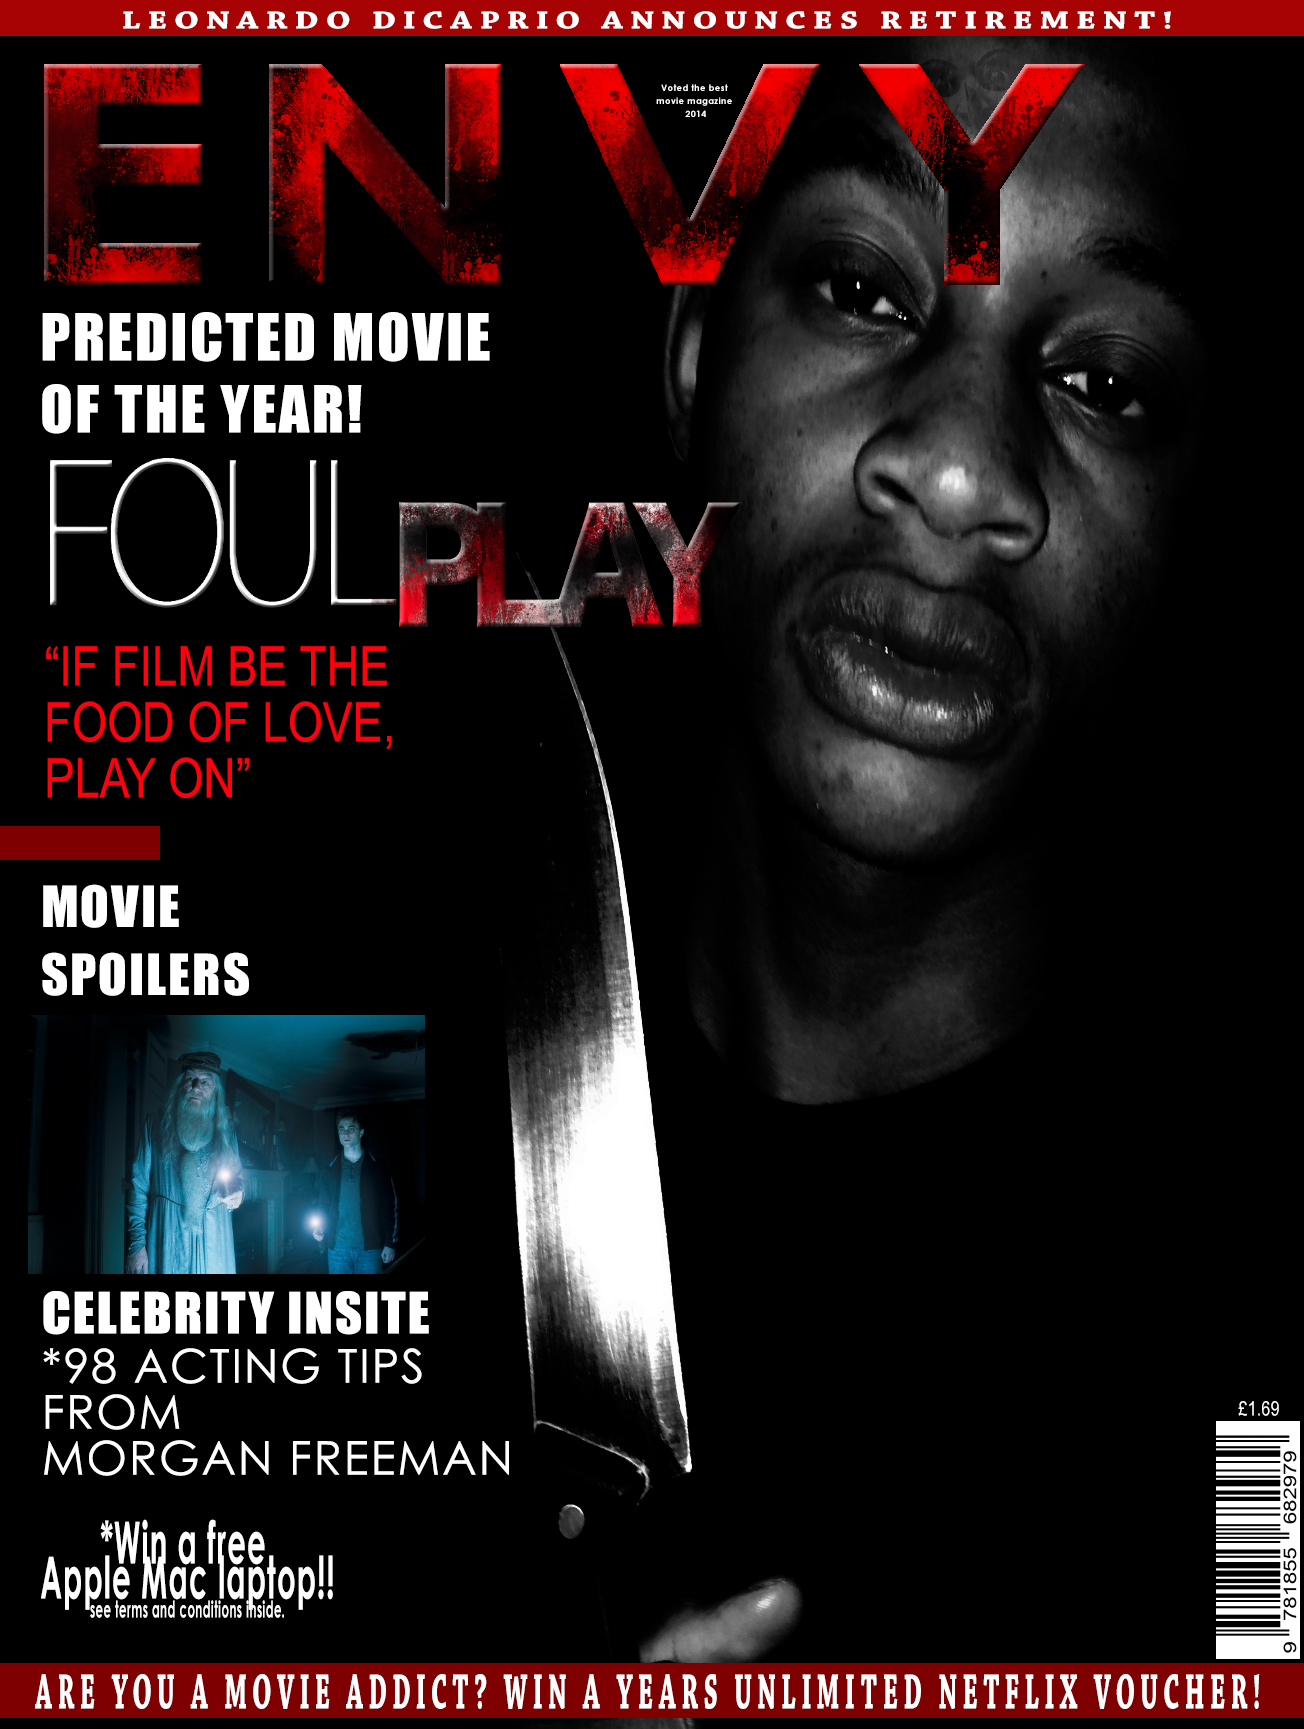
I was confident in this feedback and changing my magazine would be for the best for my magazine. The changes I made from the feedback was I replaced the Harry Potter image with a picture of Morgan Freeman as he is who I reference below so it would have worked better. Another point was I added a cracking effect on the main image to make my antagonist look distorted, I also used this cracking technique on the masthead and on the foul play title this made the images a lot more interesting, sinister and engaging for the audience. Lastly I filled the blank space on the right hand side of the magazine with a competition as my lecture said it needed filling. Having a competition will also attract my audience so this feedback was very effective.
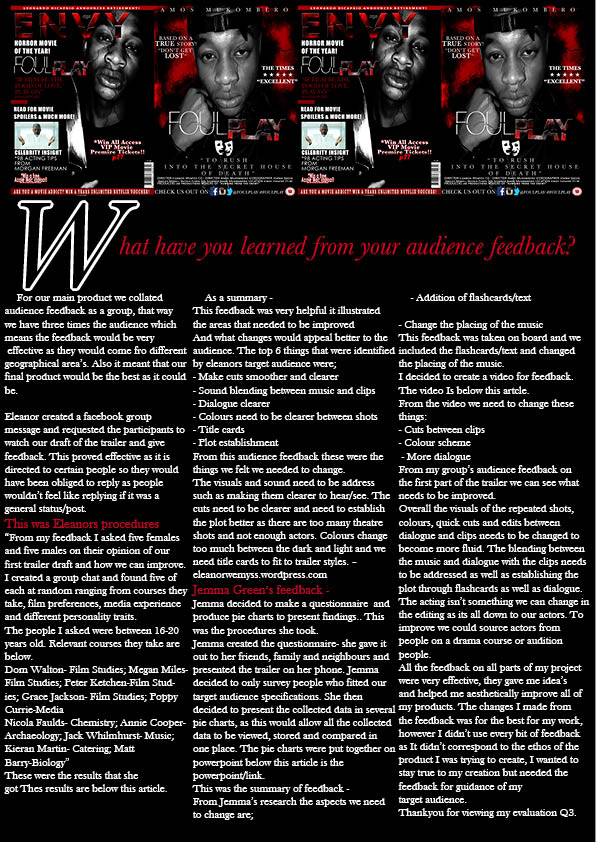
For our main product we collated audience feedback as a group, that way have three times the audience which means the feedback would be very effective as they wouldn’t be from the same group of people. Also it meant that our final product would be the best as it could be.
Eleanor created a Facebook group message and requested the participants to watch our draft of the trailer and give feedback. This proved effective as it is directed to people so they would have been obliged to reply as people wouldn’t feel like replying if it was a general status/post.
(Make this a title screen)
This was eleanors procedures
“From my feedback I asked five females and five males on their opinion of our first trailer draft and how we can improve. I created a group chat and found five of each at random ranging from courses they take, film preferences, media experience and different personality traits. The people I asked were between 16-20 years old. Relevant courses they take are below.
Dom Walton- Film Studies; Megan Miles-Film Studies; Peter Ketchen-Film Studies; Grace Jackson- Film Studies; Poppy Currie-Media
Nicola Faulds- Chemistry; Annie Cooper- Archaeology; Jack Whilmhurst- Music; Kieran Martin- Catering; Matt Barry-Biology”
These were the results that she got –
As a summary –
This feedback was very helpful it illustrated the areas that needed to be improved and what changes would appeal better to the audience. The top 6 things that were identified by Eleanor target audience were;
From this audience feedback these were the things we felt we needed to change.
The visuals and sound need to be address such as making them clearer to hear/see. The cuts need to be clearer and need to establish the plot better as there are too many theatre shots and not enough actors. Colours change too much between the dark and light and we need title cards to fit to trailer styles. – eleanorwemyss.wordpress.com
Jemma decided to make a questionnaire and produce pie charts to present findings.. This was the procedures she took.
Jemma created the questionnaire- she gave it out to my friends, family and neighbours and presented the trailer on her phone. Jemma decided to only survey people who fitted our target audience specifications. She then decided to present the collected data in several pie charts, as this would allow all the collected data to be viewed, stored and compared in one place. The pie we put together on powerpoint below this video is the powerpoint/link.
This was the summary of feedback –
From Jemma’s research the aspects we need to change are;
This feedback was taken on board and we included the flashcards/text and changed the placing of the music.
I decided to create a video for feedback. this is the link –
From the video we need to change these things:
From my group’s audience feedback on the first part of the trailer we can see what needs to be improved.
Overall the visuals of the repeated shots, colours, quick cuts and edits between dialogue and clips needs to be changed to become more fluid. The blending between the music and dialogue with the clips needs to be addressed as well as establishing the plot through flashcards as well as dialogue.
The acting isn’t something we can change in the editing as its all down to our actors. To improve we could source actors from people on a drama course or audition people.
All the feedback on all parts of my project were very effective, they gave me idea’s and helped me aesthetically improve all of my products. The changes I made from the feedback was for the best for my work, however I didn’t use every bit of feedback as It didn’t correspond to the ethos of the product I was trying to create, I wanted to stay true to my creation but needed the feedback for guidance of my target audience. Thank you for viewing the video, I hope you enjoyed.
For this evaluation question I decided to use PowToon to present. My whole presentation didn’t fit in one PowToon presentation so I had to create a part one and two. I apologise for this inconvenience!
Part 1
Part 2
The purpose of this post is to have one location for all of my feedback for my publications. The feedback on this post may be repeated from other posts such as ‘Poster creation’, ‘Magazine creation’ and ‘Trailer creation’. I found it easier to read it all on one post rather than going on the separate posts.
As a group we decided to do a draft of our trailer and get feedback. This way we could use the feedback to reconstruct our work, feedback is important as we a creating a product for an audience and knowing what they want from a trailer means we are that step closer to getting potential customers for or product if we were to produce the full movie. Jemma Green suggested we each ask our target audience feedback in different media formats. From this Eleanor used Facebook to ask for feedback; Jemma created a paper questionnaire and I created a video.
This was Eleanor’s feedback procure and results:
From my feedback I asked five females and five males on their opinion of our first trailer draft and how we can improve. I created a group chat and found five of each at random ranging from courses they take, film preferences, media experience and different personality traits. The people I asked were between 16-20 years old. Relevant courses they take are below.
Dom Walton- Film Studies; Megan Miles-Film Studies; Peter Ketchen-Film Studies; Grace Jackson- Film Studies; Poppy Currie-Media
Nicola Faulds- Chemistry; Annie Cooper- Archaeology; Jack Whilmhurst- Music; Kieran Martin- Catering; Matt Barry-Biology
This helped me to know what areas needed to be improved and what changes would appeal better to the audience. The top 6 things that were identified by my target audience were;
- Make cuts smoother and clearer
- Sound blending between music and clips
- Dialogue clearer
- Colours need to be clearer between shots
- Title cards
- Plot establishment
So the visuals and sound need to be address such as making them clearer to hear/see. The cuts need to be clearer and need to establish the plot better as there are too many theatre shots and not enough actors. Colours change too much between the dark and light and we need title cards to fit to trailer styles. – eleanorwemyss.wordpress.com
I used Microsoft word to do this. I decided to include questions which would help us identify any problems with the trailer and also to tell us what we wanted to hear in terms of whether we have managed to convey plot, genre conventions and excite the audience. ~Jemma Green, greenjemma72.wordpress.com
Jemma went old fashioned and created a questionnaire. The audience would watch the trailer prior filling out the questionnaire. Jemma then collected the data and created pie charts to show the data. below is the questionnaire and her results.
Here are the results of my questionnaire, I gave it out to my friends, family and neighbours and showed them the trailer on my phone. I decided to only survey people who fitted our target audience specifications therefore I did not ask anyone over the age of 20 to fill in a questionnaire.I initially thought of scanning each completed questionnaire in however I then decided that there were too many completed sheets to scan in to present effectively. I then decided that I should present the collected data in several pie charts, as this would allow all the collected data to be viewed, stored and compared in one place. I therefore created these pie charts that can be seen below using the questionnaire data, i then disposed of the questionnaires as they were no longer needed. Here are the results below with a brief explanation of the findings. ~Jemma Green, greenjemma72.wordpress.com
Jemma used powerpoint to put her pie charts together. This was for easier viewing.
From Jemma’s research the aspects we need to change are;
1. Addition of flashcards/text
2. Change the placing of the music
As we are living in a tech savvy era I decided to use my iPhone I downloaded an application called ‘Splice’ from the app store. This app allowed me to shoot separate videos, and cut and edit the separate videos to make one finalised video. I was able to add a soundtrack in the background and title to enhance the video.
On the bottom left of this screen shot you can see the app ‘Splice which is what i used.

These are the separate video’s I used to comprise my final video

This was the editing process. I then had to preview, export and publish my work onto Youtube.

Below is the final video. Enjoy!
From the video we need to change these things:
1. Cuts between clips
2. Colour scheme
3. More dialogue
From my group’s audience feedback on the first part of the trailer we can see what needs to be improved.
Overall the visuals of the repeated shots, colours, quick cuts and edits between dialogue and clips needs to be changed to become more fluid. The blending between the music and dialogue with the clips needs to be addressed as well as establishing the plot through flashcards as well as dialogue.
The acting isn’t something we can change in the editing as its all down to our actors. To improve we could source actors from people on a drama course or audition people.
Below is the version of my poster I asked for feedback on.

For this movie poster I went on Facebook (a public social networking site) so that I could get general feedback from the public here is the feedback that I received:
This was the post I wrote prior the feedback.
![]()
After the feedback I received I reconstructed my poster changing around the playing with the advise I received. An aspect I didn’t include was the mask picture, this was because I found it on another publication that was not my own and including it would have meant that I was breaching the copyright act. Aspects I decided to add on top of the feedback were social networking information on the bottom of the poster, this included the twitter hashtag #FoulPlay and the @FilmFoulPlay for Facebook and Instagram. This would embrace advertising for the movie.
For the cracking affect on the face, and titles I used the lasso and quick selection tool to select the piece I wanted to crack and I then clicked ono the move tool to move the selected part from the original image giving a cracking affect. This also worked for the titles.
Below is a version of my magazine front cover I asked feedback for
For this magazine front cover I went on Facebook (a public social networking site) so that I could get general feedback from the public here is the feedback that I received:
This was the post I wrote prior the feedback.
![]()
From this feedback I will change the image so that it fits my genre more as the consensus of this feedback is that it doesn’t suit the horror genre. I will also minimise the story lines on the left hand side and bring them in as they are too close to the edge. I will also have ‘Foul Play’ in the same format as my poster to embrace synergy in my products. I think I will also have to change the background colour from white to black so that it adds to the chosen genre.
This version of my magazine was the one I changed with the feedback I received. I then asked my lecture to have a look at it and feedback i received from him was the the harry potter picture didn’t have a clear link or significance to the overall magazine so I replaced this image with a picture of Morgan Freeman as he is who I reference bellow so it would have worked better. Another point was I needed to add more horror conventions, as the picture was bland and had no substance. Also the right side of the main image needed to be filled so I added a competition. This was the outcome.
For the cracking affect on the face, and titles I used the lasso and quick selection tool to select the piece I wanted to crack and I then clicked onto the move tool to move the selected part from the original image giving a cracking affect. This also worked for the titles.
For the creation of the trailer there were elements that we had to aim our main focus on. Those were: Lighting, music and continuity. In this post I will be illustrating the steps we have taken as a group to merge these elements to finalise our trailer. I will also be including drafts of the trailer.
Filming days were very short; starting at 9am and finishing at 1pm. The reason for this was the environment was very busy. They had to accommodate us and still run their business, the theatre had a show not long after us so they needed time to set up and rehears. However this short time didn’t affect us, we just had to work efficiently as possible, making sure we had got enough footage. The consensus on the filming days was positive for all participants whether that be the cast and the crew.
We used both ambient and artificial lighting. To contrast effects, the ambient lighting would add to setting the scene for the genre, for example the stair well scene where the actors find the cursed object and there is a chase there is ambient lighting from the sun coming from the top, restricting the whole stair well to be lit so it contrasts well and on camera the lighting is very good. An artificial lighting example was the well scene, we had to turn the lights out so it was pitch black and as we didn’t have the finance to buy high technological movie lighting we had to use the lights on our phones so we could see Nicola Flynn (Olivia), however the low quality of our lights worked really well as it gave an unsettling psychological setting which was perfect for the type of scene we were trying to capture along side the acting.
For continuity purposes we kept the costumes, and hair and make up for the actors the same. We also kept the same props. We had to film the Well scene last so Nicola Flynn (Olivia) could have a clean costume thought the day and again for continuity purposes.
The dialogue for our trailer was kept at a minimum as we didn’t want to reveal too much of the movie. We wanted to keep the audience on their toes at a constant. However the dialogue that we did have was clear, if it wasn’t we redone the shot multiple times until we were confident it was clear. The music we have chosen will fit in well to the genre and theme of Shakespeare as it is from Franco Zeffirelli’s Romeo and Juliet (1968). It has a slow and sombre singing and doesn’t seem modern as it is over 45 years old.
We decided on various camera shots and angles in our pre-production and we kept well to it when filming. This included POV, close-up, handheld, high/low angle, tracking shots, establishing and a fair few others. This is so we could keep the pace to the trailer as well as show off as much of the location as possible.
On these other films we went around the theatre to get more footage of the theatre itself to get establishing shots of the venue. These shots were jump shots and shots the better fitted our chosen genre as we didn’t have many from our first filming day. We chose doors, seats, bars, backstage, under the stage etc.
Consisted of: Rachael Selwood, George Currie, Jemma Green and Eleanor Wemyss
Consisted of: Sebastian Scorrer, Amos Mukombero, Pat Saunders, Hayley Newell Nicola Flynn
Music in a trailer is very important as it adds to atmosphere and makes the audience endure the physical setting of the trailer. It gives more of an impact to what is happening in the trailer, this could be a fast cut with slow, eerie jerky music.
For our trailer we used the programme audacity Eleanor could best use this programme to mix the soundtrack. However we did help her research techniques that can be used to make an effective horror soundtracks on the internet. These are the steps Eleanor took in order to complete the mix.
Below is the final mix finished.
https://www.youtube.com/watch?v=33XUlwRqCpA
The music that we chose to use all are lyrical snippets from other Shakespeare plays such as ‘Twelfth Night’ and ‘The Merchant of Venice’ which linked well to the varied characters we had borrowed from the bards plays. This was a reference from “The Cambridge Companion to Shakespeare and Popular Culture” (Cambridge University Press. 2007. pp. 156–157). An arrangement called “A time for us” would have been a good second choice to What Is A Youth though it is much more sorrowful and eerier which suits our genre but would’ve been too deafening as it is rather high pitch and is more full of love. We changed the tempo and pitch of the piece to create a more eerie and secluded sound to fit with our genre and pace of the trailer, as the editing and shots would have to fit the tempo and lyrics.
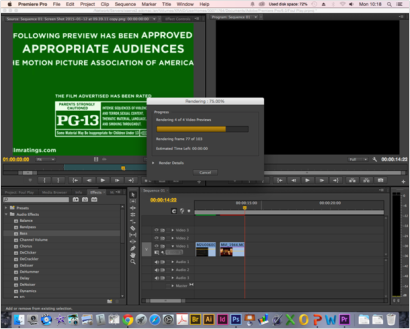
This element is important to keep the trailer looking as professional as possible the purpose to show rating for the trailer/movie for the audience. Warning the audience what the movie/trailer may contain.
We acquired the layout font’s and contents on-line and we created our own green screen intro using Adobe Photoshop. It ended up looking like this:
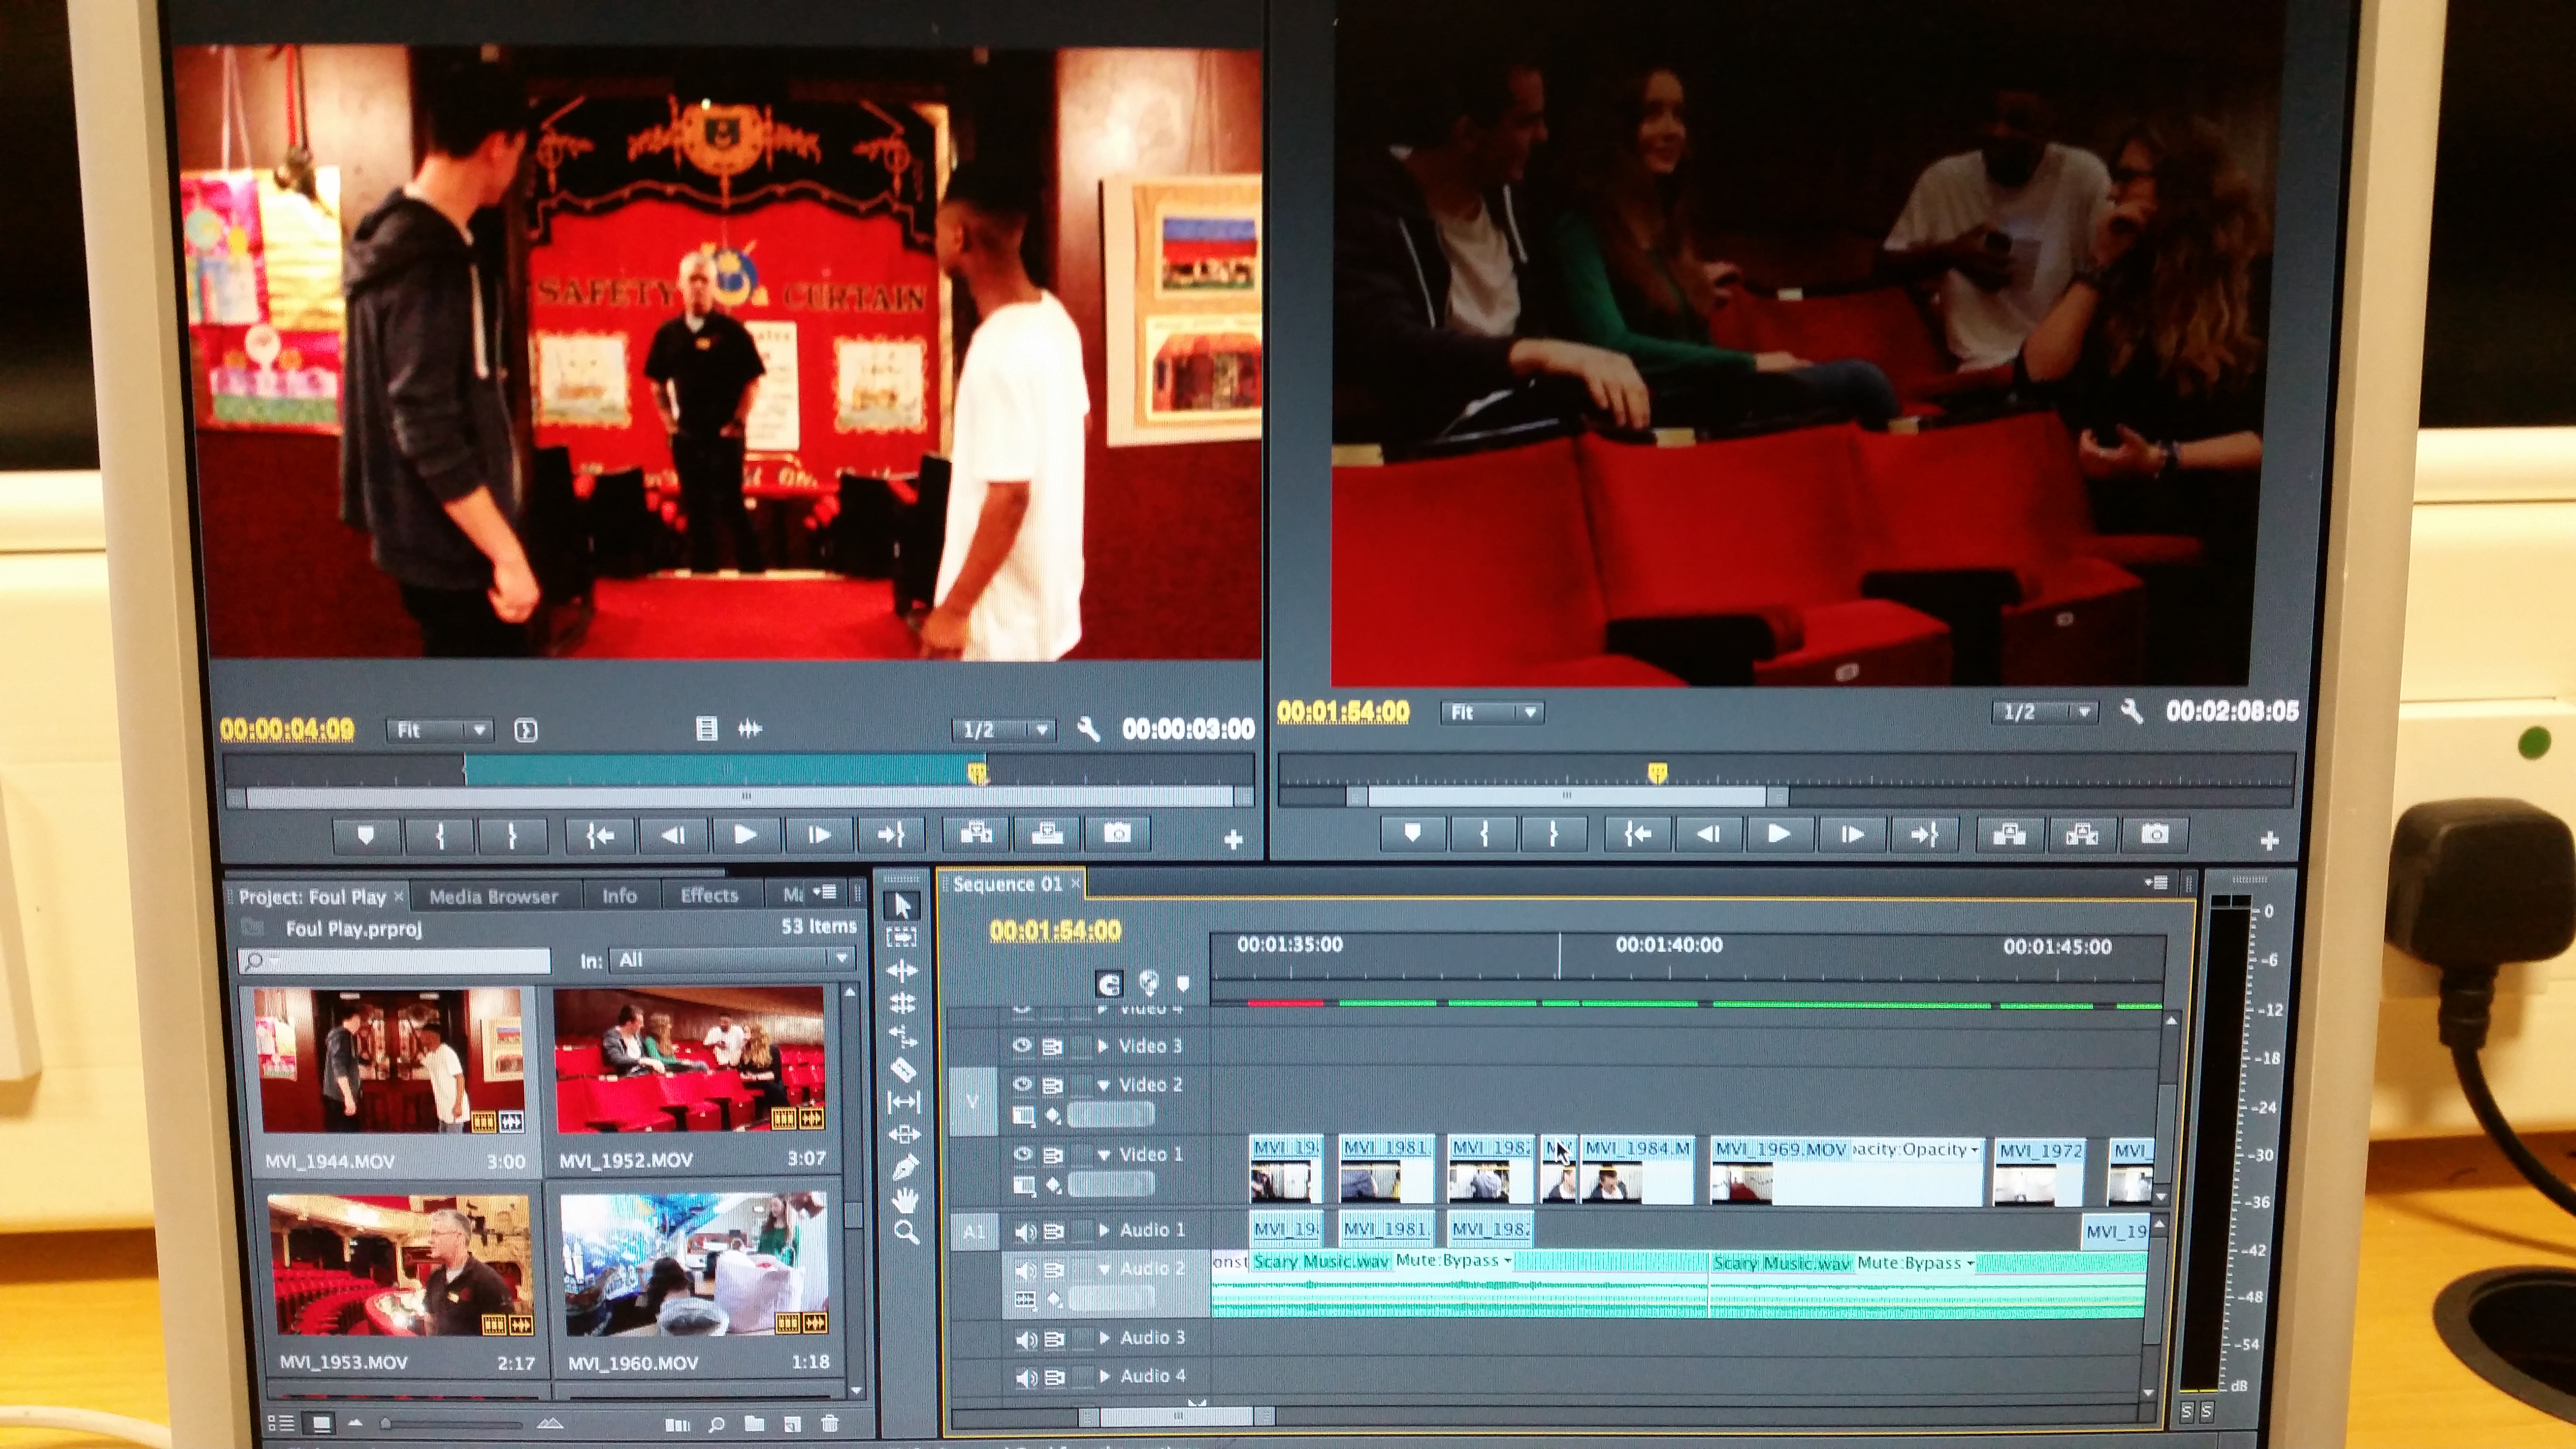
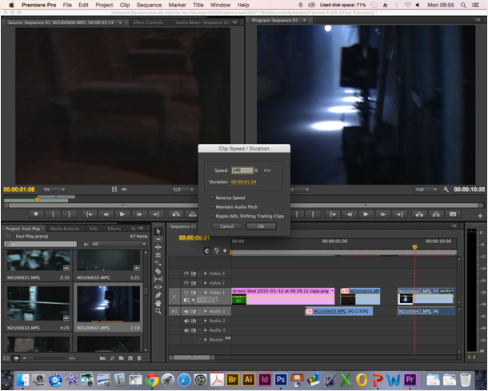 Changing the clip speed: This made the music fit better as it went with the speed and made a more jumpy cut and gave a darker appeal to the frame
Changing the clip speed: This made the music fit better as it went with the speed and made a more jumpy cut and gave a darker appeal to the frame
As the editing was taking so long to do as a group we decided to each do a bit then the principle editor would do the majority based on the input of other members and the storyboard. Therefore I began the main editing.
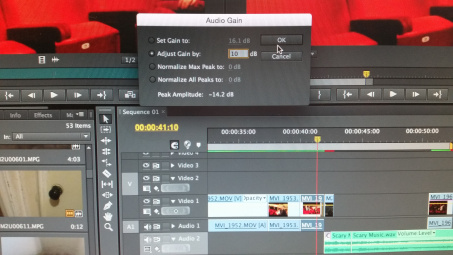
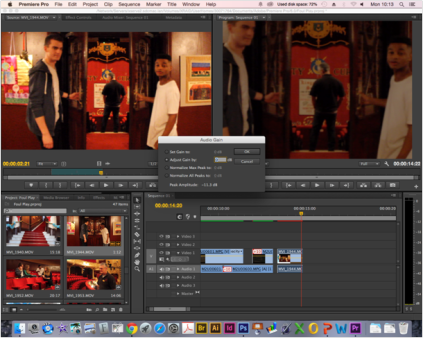
I again adjusted the audio gain by +10 db (decibels) to make the clip louder as it had the main dialogue within it that sets the scene of the trailer. This shot was particularly needed as it showed the characters as friends and opened the way to the narrative and the reason they were at the theatre.
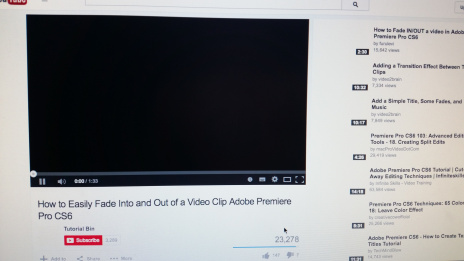
As I did not know how to fade in/out on a clip I looked it up on YouTube as it has tons of useful tutorials for things. This is how I learnt to use Premier Pro’s additional effects
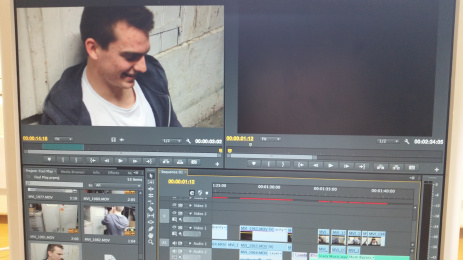
This is how I cut the clip to the exact short moment I wanted as it creates more of the suspense.
meaning is apparent to the viewer and making selective and appropriate use of shot transitions, captions and other effects
Minor trailer elements that we needed for our trailer were flash cards. We used Adobe Photoshop to create these flash cards. The process in making them was setting the document to be 56 height to 72 wide. We would then use the shape tool of a rectangle and put it over the background, We decided to make this rectangle black. The next step was using the text tool (as horizontal text) setting the font to Baskervile at a size of 150pt. After doing this we used the lasso tool to select a jagged selection so we could break up the text to incorporate it to the genre and give it more of an effect. We decided to keep the flash cards as simple and plain as possible so the audience can read them without distractions. To export the Photoshop document you had to save is as a JPEG from its original file format of PSD. We repeated this process for all of the flash cards we made.
These are the steps I took using photoshop:
We added these flashcards as a result from our audience feedback.
Having a production company for our trailer was also important as, this would add to the professionalism of our trailer. This would be the company that would help us in production if it was a real life scenario. We needed a graphic for our trailer. So for this I done some research into production companies that are already well established to see which company would best fit our trailer.
From this we reviewed it as a group and felt that Universal Pictures would suit our trailer best. Jemma Green found a into for us to use. The link is bellow.
URL:http://www.youtube.com/watch?v=eXRsNYKc-Xk
This was the rough copy of the trailer in Adobe Premier Pro rendering
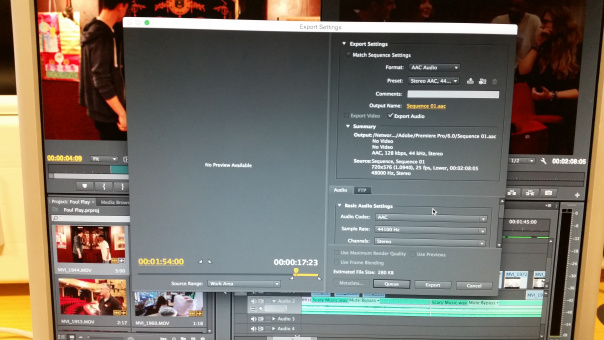
Exporting the trailer

Exporting the trailer again
This is the rough cut of the trailer without any changes. This is useful as I can see what problems there are and what needs to be done.
Issues: The quality has been affected and is not easy to see. This is due to the exporting which I will now try and change to make it easier to see.
We I watched a tutorial on how to properly export in Adobe Premier Pro and have created the appropriate settings for it.
As a group we decided to do a draft of our trailer and get feedback. This way we could use the feedback to reconstruct our work, feedback is important as we a creating a product for an audience and knowing what they want from a trailer means we are that step closer to getting potential customers for or product if we were to produce the full movie. Jemma Green suggested we each ask our target audience feedback in different media formats. From this Eleanor used Facebook to ask for feedback; Jemma created a paper questionnaire and I created a video.
This was Eleanor’s feedback procure and results:
From my feedback I asked five females and five males on their opinion of our first trailer draft and how we can improve. I created a group chat and found five of each at random ranging from courses they take, film preferences, media experience and different personality traits. The people I asked were between 16-20 years old. Relevant courses they take are below.
Dom Walton- Film Studies; Megan Miles-Film Studies; Peter Ketchen-Film Studies; Grace Jackson- Film Studies; Poppy Currie-Media
Nicola Faulds- Chemistry; Annie Cooper- Archaeology; Jack Whilmhurst- Music; Kieran Martin- Catering; Matt Barry-Biology
This helped me to know what areas needed to be improved and what changes would appeal better to the audience. The top 6 things that were identified by my target audience were;
- Make cuts smoother and clearer
- Sound blending between music and clips
- Dialogue clearer
- Colours need to be clearer between shots
- Title cards
- Plot establishment
So the visuals and sound need to be address such as making them clearer to hear/see. The cuts need to be clearer and need to establish the plot better as there are too many theatre shots and not enough actors. Colours change too much between the dark and light and we need title cards to fit to trailer styles. – eleanorwemyss.wordpress.com
I used Microsoft word to do this. I decided to include questions which would help us identify any problems with the trailer and also to tell us what we wanted to hear in terms of whether we have managed to convey plot, genre conventions and excite the audience. ~Jemma Green, greenjemma72.wordpress.com
Jemma went old fashioned and created a questionnaire. The audience would watch the trailer prior filling out the questionnaire. Jemma then collected the data and created pie charts to show the data. below is the questionnaire and her results.
Here are the results of my questionnaire, I gave it out to my friends, family and neighbours and showed them the trailer on my phone. I decided to only survey people who fitted our target audience specifications therefore I did not ask anyone over the age of 20 to fill in a questionnaire.I initially thought of scanning each completed questionnaire in however I then decided that there were too many completed sheets to scan in to present effectively. I then decided that I should present the collected data in several pie charts, as this would allow all the collected data to be viewed, stored and compared in one place. I therefore created these pie charts that can be seen below using the questionnaire data, i then disposed of the questionnaires as they were no longer needed. Here are the results below with a brief explanation of the findings. ~Jemma Green, greenjemma72.wordpress.com
Jemma used powerpoint to put her pie charts together. This was for easier viewing.
From Jemma’s research the aspects we need to change are;
1. Addition of flashcards/text
2. Change the placing of the music
As we are living in a tech savvy era I decided to use my iPhone I downloaded an application called ‘Splice’ from the app store. This app allowed me to shoot separate videos, and cut and edit the separate videos to make one finalised video. I was able to add a soundtrack in the background and title to enhance the video.
On the bottom left of this screen shot you can see the app ‘Splice which is what i used.
These are the separate video’s I used to comprise my final video
This was the editing process. I then had to preview, export and publish my work onto Youtube.
Below is the final video. Enjoy!
From the video we need to change these things:
1. Cuts between clips
2. Colour scheme
3. More dialogue
From my group’s audience feedback on the first part of the trailer we can see what needs to be improved.
Overall the visuals of the repeated shots, colours, quick cuts and edits between dialogue and clips needs to be changed to become more fluid. The blending between the music and dialogue with the clips needs to be addressed as well as establishing the plot through flashcards as well as dialogue.
The acting isn’t something we can change in the editing as its all down to our actors. To improve we could source actors from people on a drama course or audition people.
After responding to our feedback we had our final trailer. Enjoy!
To make our work as professional as possible we used Celtx.com, which is a pre-production software used to create media projects such as screenplays, videos, stage plays, films, audio plays, documentaries, comics, games and storyboards.
We worked as a group to write the script designing the dialogue. However Eleanor knew the programme best as she uses it for her Film A Level she added action and scene headings to adhere to the script writing style of films.
To present the Celtx document I had to transform the format to PDF.
During filming the script is subject to change due to setting and the prospect of additional lines of dialogue.
This is the shot list of our trailer ‘Foul Play’, which was created using the storyboard of the trailer that we created as a group.
This document was created on Microsoft excel, how ever I transferred it to word as it looked better when viewing it on my blog.
Excel Doc: Shot List
